Tutorials
SOLIDWORKS sketching — basics and all tools
Every SOLIDWORKS part starts as a 2D sketch on a plane or a flat face. You draw rough shapes, then dimensions and relations make them exact. When the sketch turns black it is fully defined, and you turn it into a solid with a feature such as Extrude. This page explains the basics every sketch shares; the 17 lessons below cover each tool in the order you need them.
 Kevin Walsh
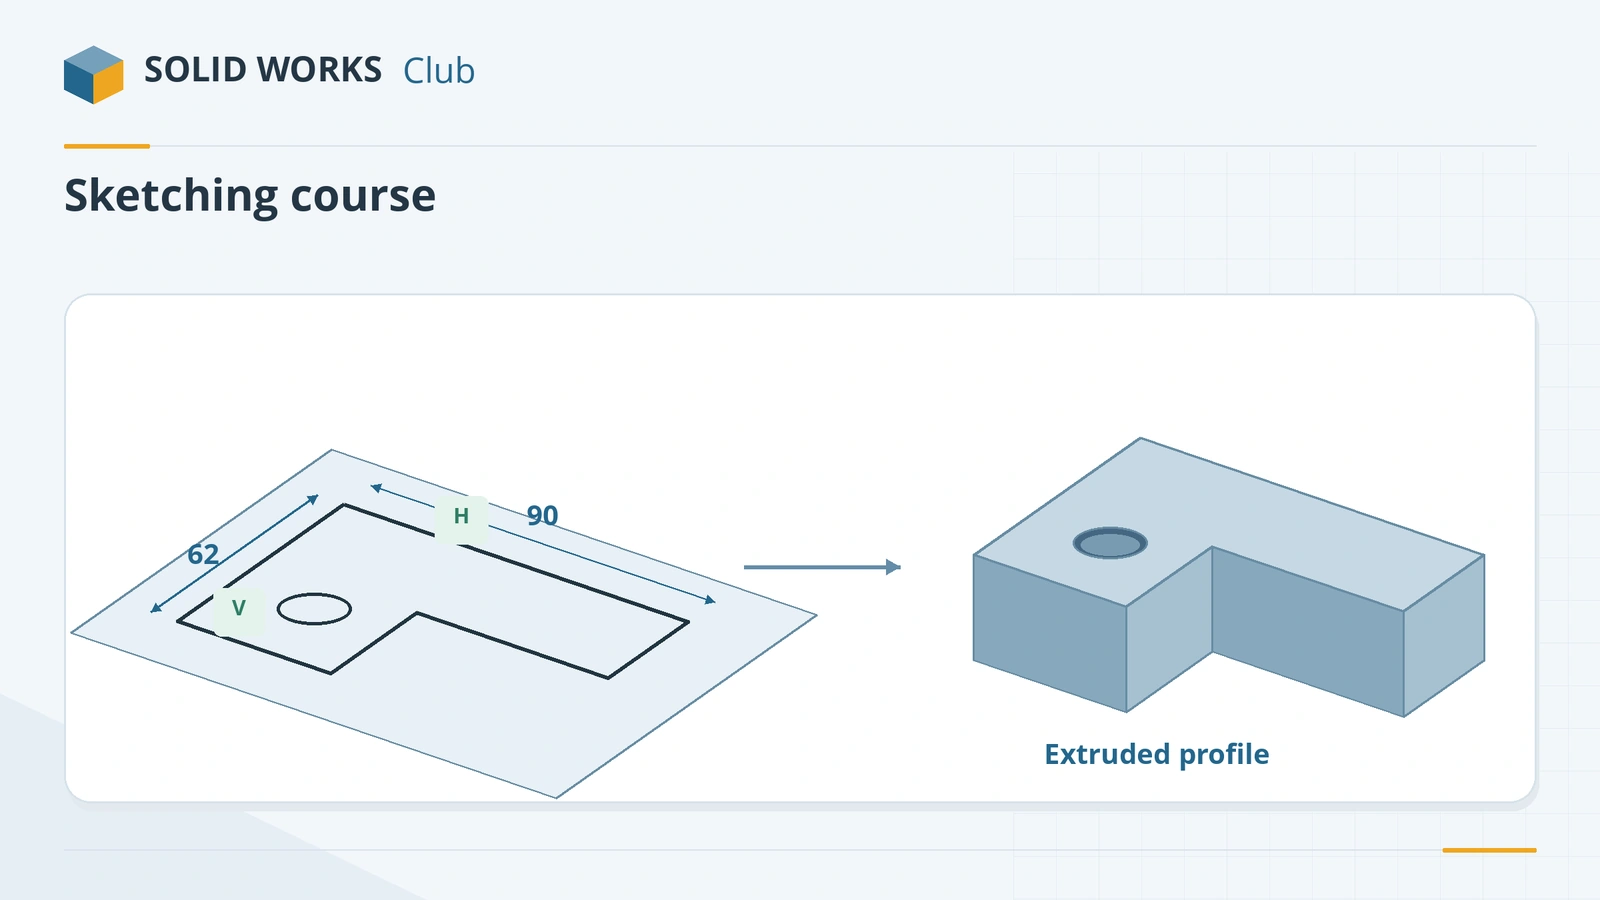
Start and exit a sketch
- Click Sketch on the Sketch tab (the icon itself — its arrow holds 3D Sketch).
- Pick a plane — Front, Top or Right — or any flat face of the part. The view rotates to face it; this is the option Auto-rotate view normal to sketch plane.
- You are in the sketch when the origin turns red and the Sketch button reads Exit Sketch.
- Draw, dimension, then leave with Exit Sketch or the sketch icon in the confirmation corner at the top right. The red X there throws your changes away.
Shortcut: select a plane and press L — SOLIDWORKS opens a sketch and starts the Line tool at once. Press Ctrl + 8 to look straight at the sketch again after rotating the view.
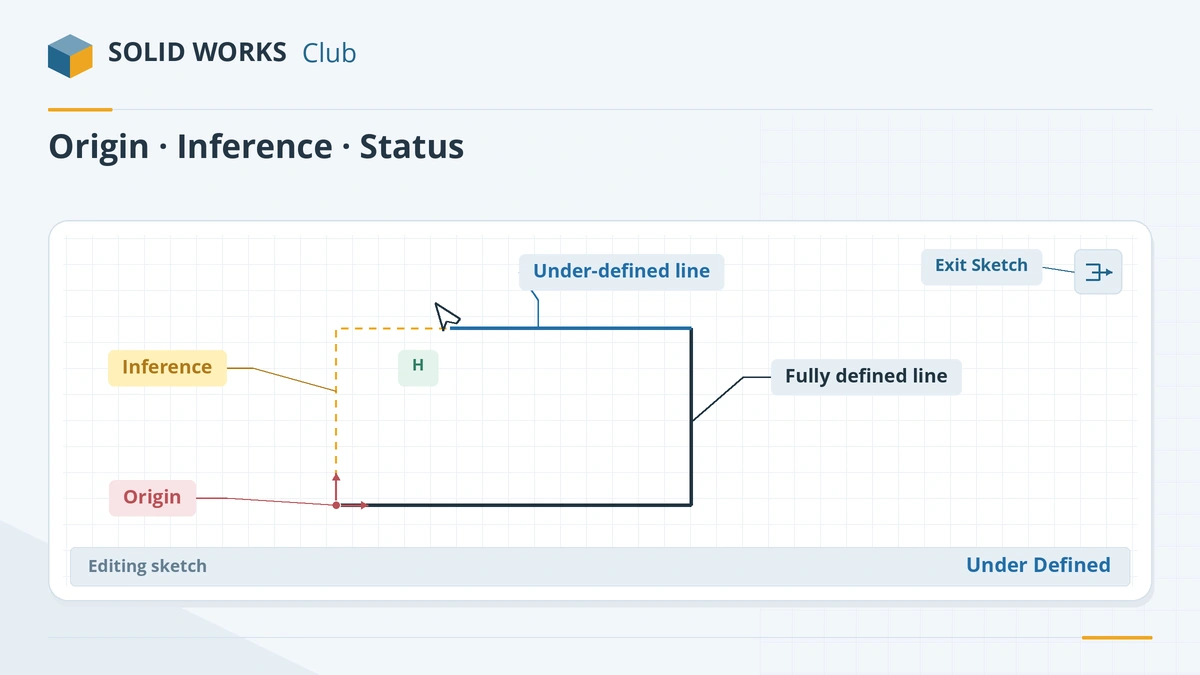
What you see while sketching
| Signal | Meaning |
|---|---|
| Yellow dotted inference line with a small icon | SOLIDWORKS will add that relation (horizontal, coincident…) when you click |
| Blue dashed line back to the origin | Visual aid only — no relation is added |
| Yellow relation icons while drawing | Automatic relations being added |
| Green relation icons when you select | Relations that already exist |
| Blue geometry | Under defined — can still move |
| Black geometry | Fully defined |
| Red geometry | Over defined or conflicting |
| Status bar (bottom right) | Under Defined, Fully Defined or Over Defined |
Hold Ctrl while clicking to skip automatic relations for that point, and Shift to snap to the grid. Relations and colours are explained in sketch relations and fully defined sketches.
Click-click or click-drag?
Most sketch tools work both ways. Click-click (click, release, click again) keeps tools like Line in a chain, so you can draw a closed outline without stopping. Click-drag draws one entity and stops. Beginners usually find click-click faster for outlines.
Five rules for good sketches
- Start at the origin — it ties the sketch to the part.
- Draw roughly, then dimension — the numbers shown while drawing are a preview, not a size.
- Keep sketches simple — several simple features rebuild and edit better than one complex sketch.
- Close the outline for Extrude, Cut and Revolve; turn on Shaded Sketch Contours on the Sketch tab to see closed areas.
- Fully define before you move on.
Problems? See sketch errors. Want a quick result first? Build your first part.
The 17 sketching lessons
-
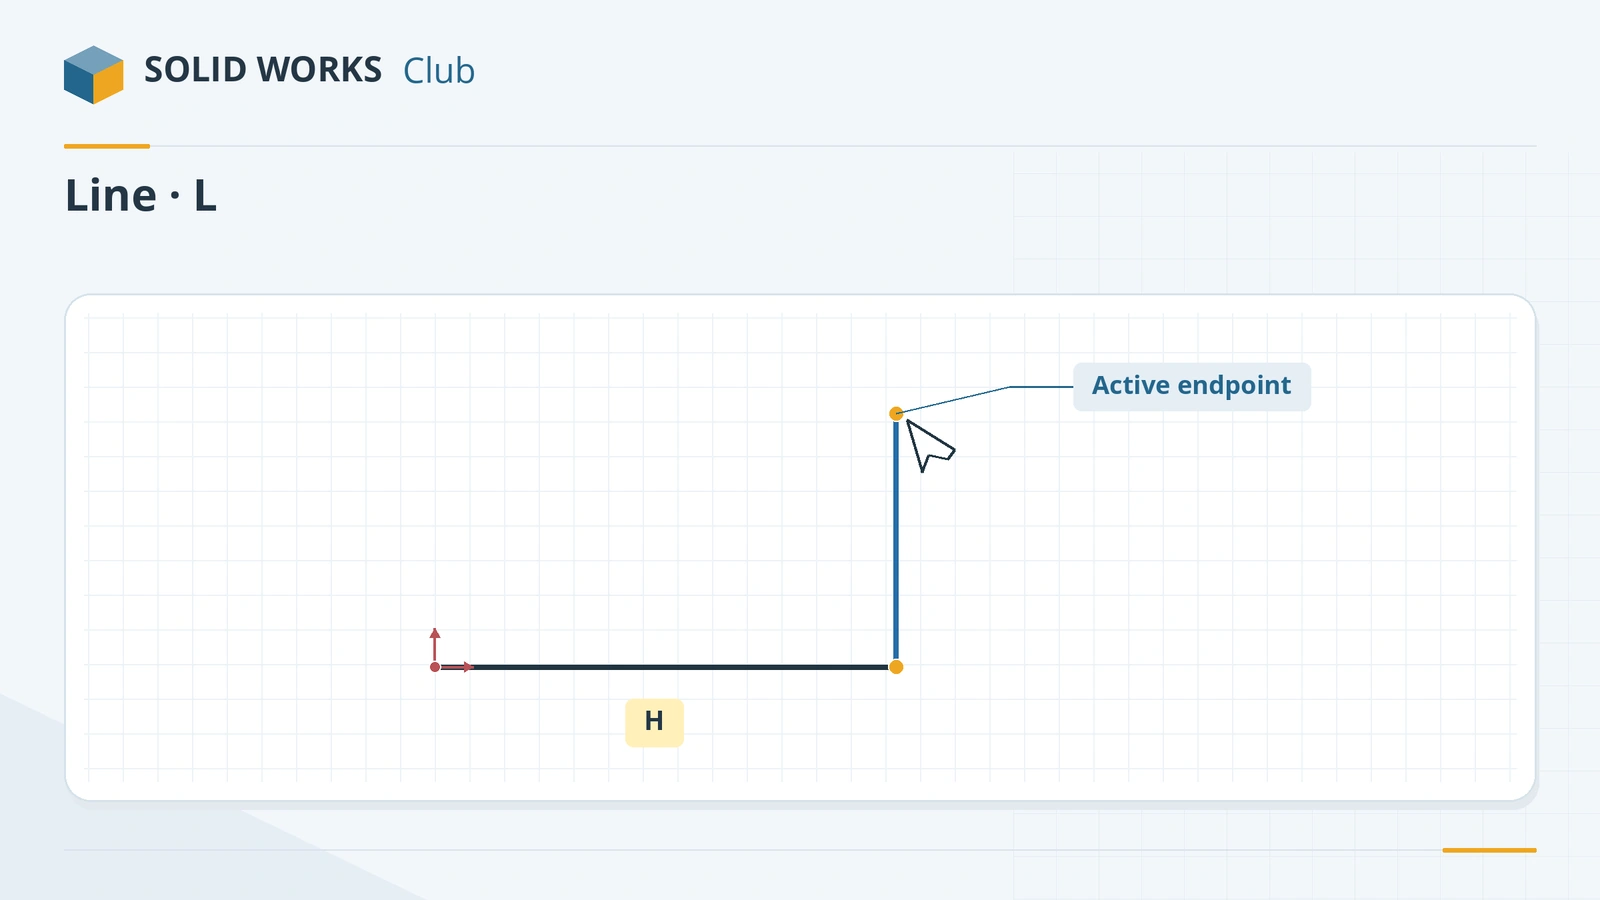 SOLIDWORKS Line toolHow to draw lines in SOLIDWORKS: the Line, Centerline and Midpoint Line tools, chain drawing, switching to a tangent arc, orientation options and L.
-
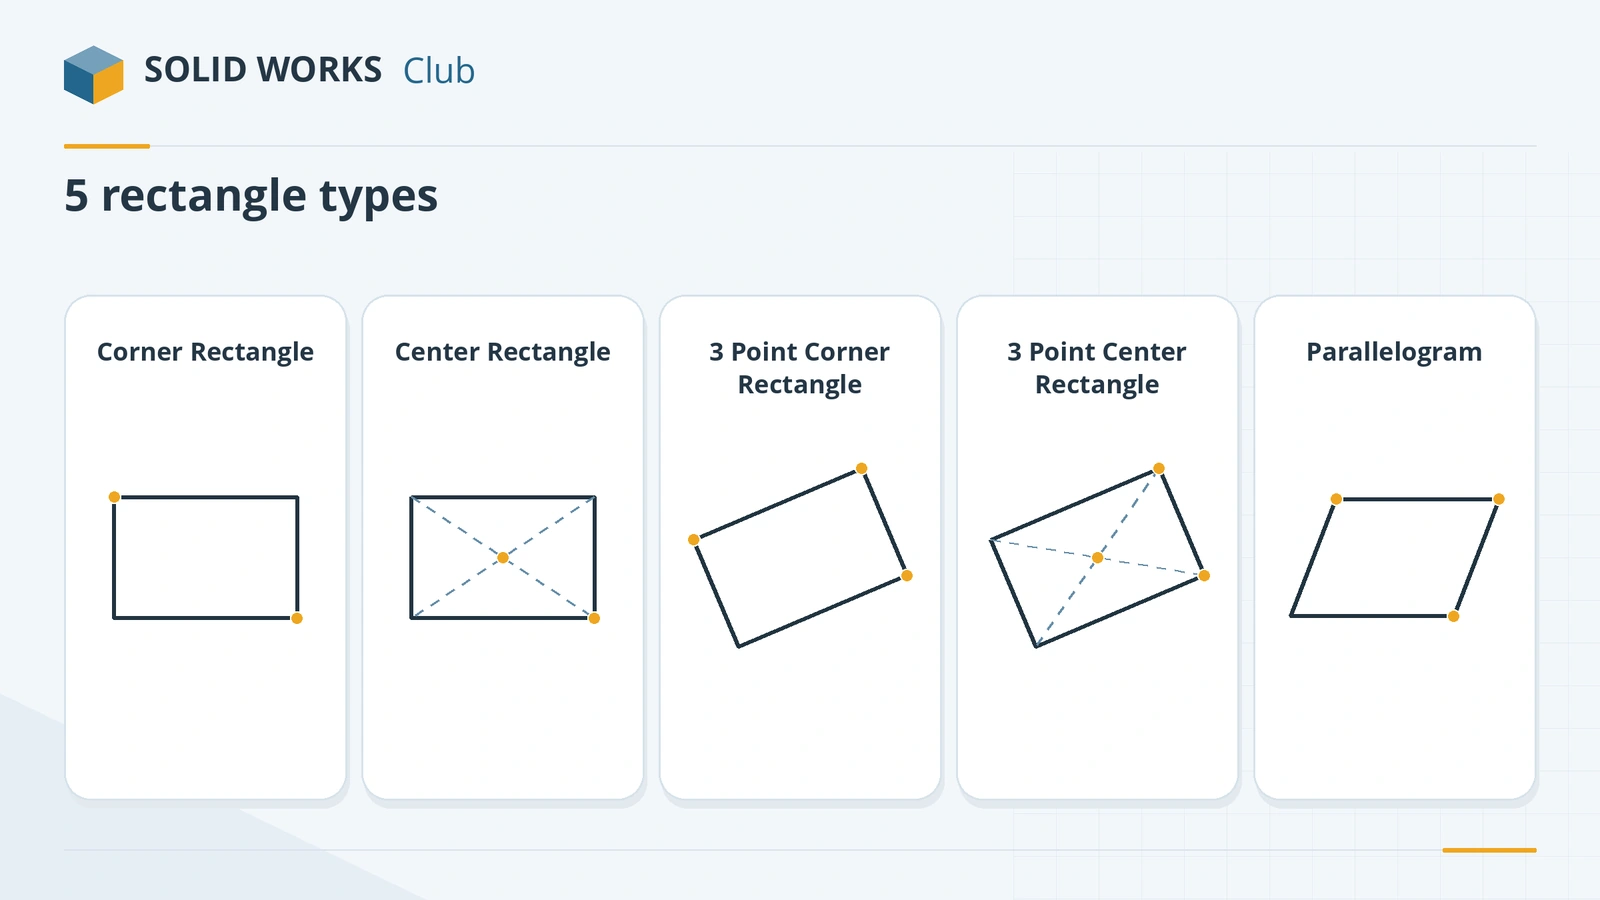 SOLIDWORKS rectangle toolsHow to sketch rectangles in SOLIDWORKS: Corner, Center, 3 Point Corner, 3 Point Center and Parallelogram, with construction lines and centring.
-
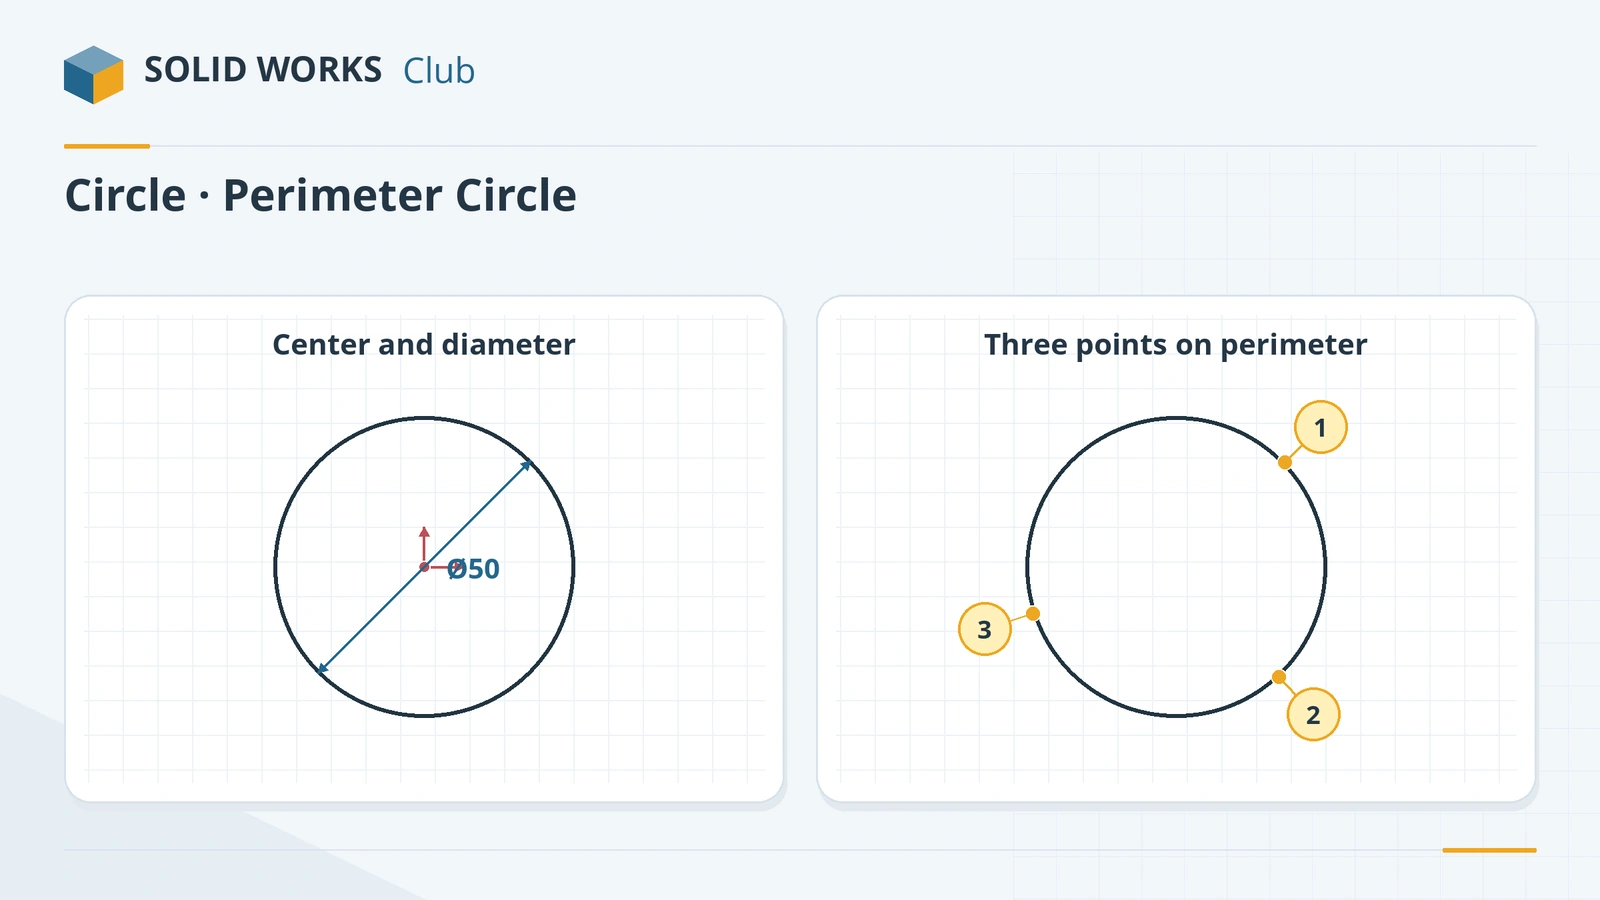 SOLIDWORKS circle toolsHow to sketch circles in SOLIDWORKS with the Circle and Perimeter Circle tools, dimension the diameter, add Equal relations and measure to the edge.
-
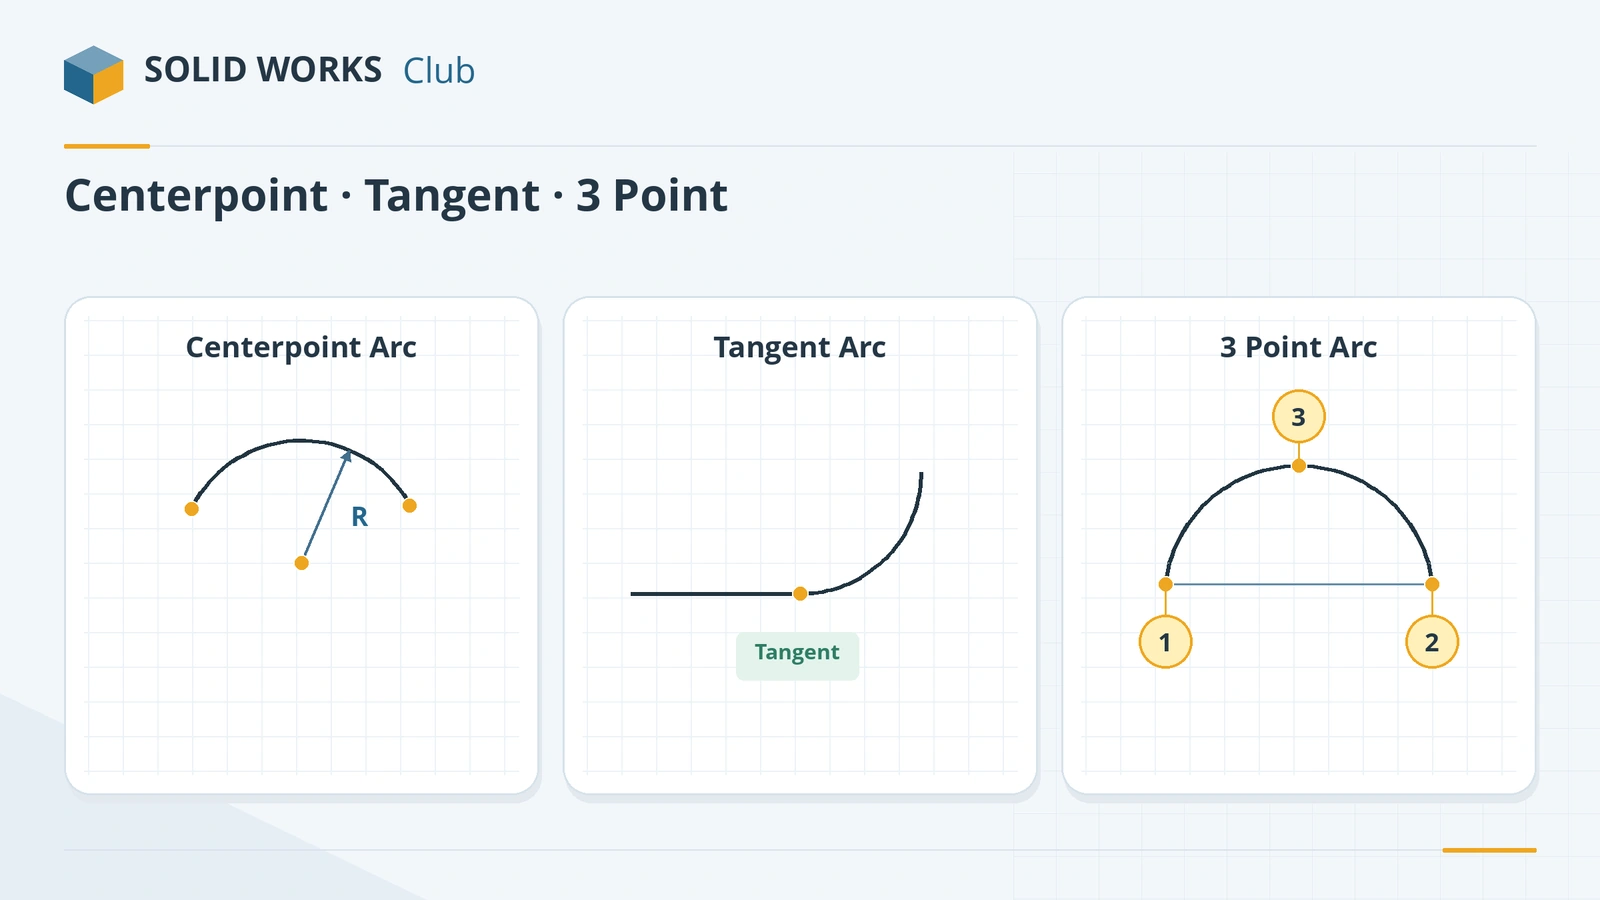 SOLIDWORKS arc toolsHow to sketch arcs in SOLIDWORKS: Centerpoint Arc, Tangent Arc and 3 Point Arc, when to use each, how to reverse tangency and why not to trim circles.
-
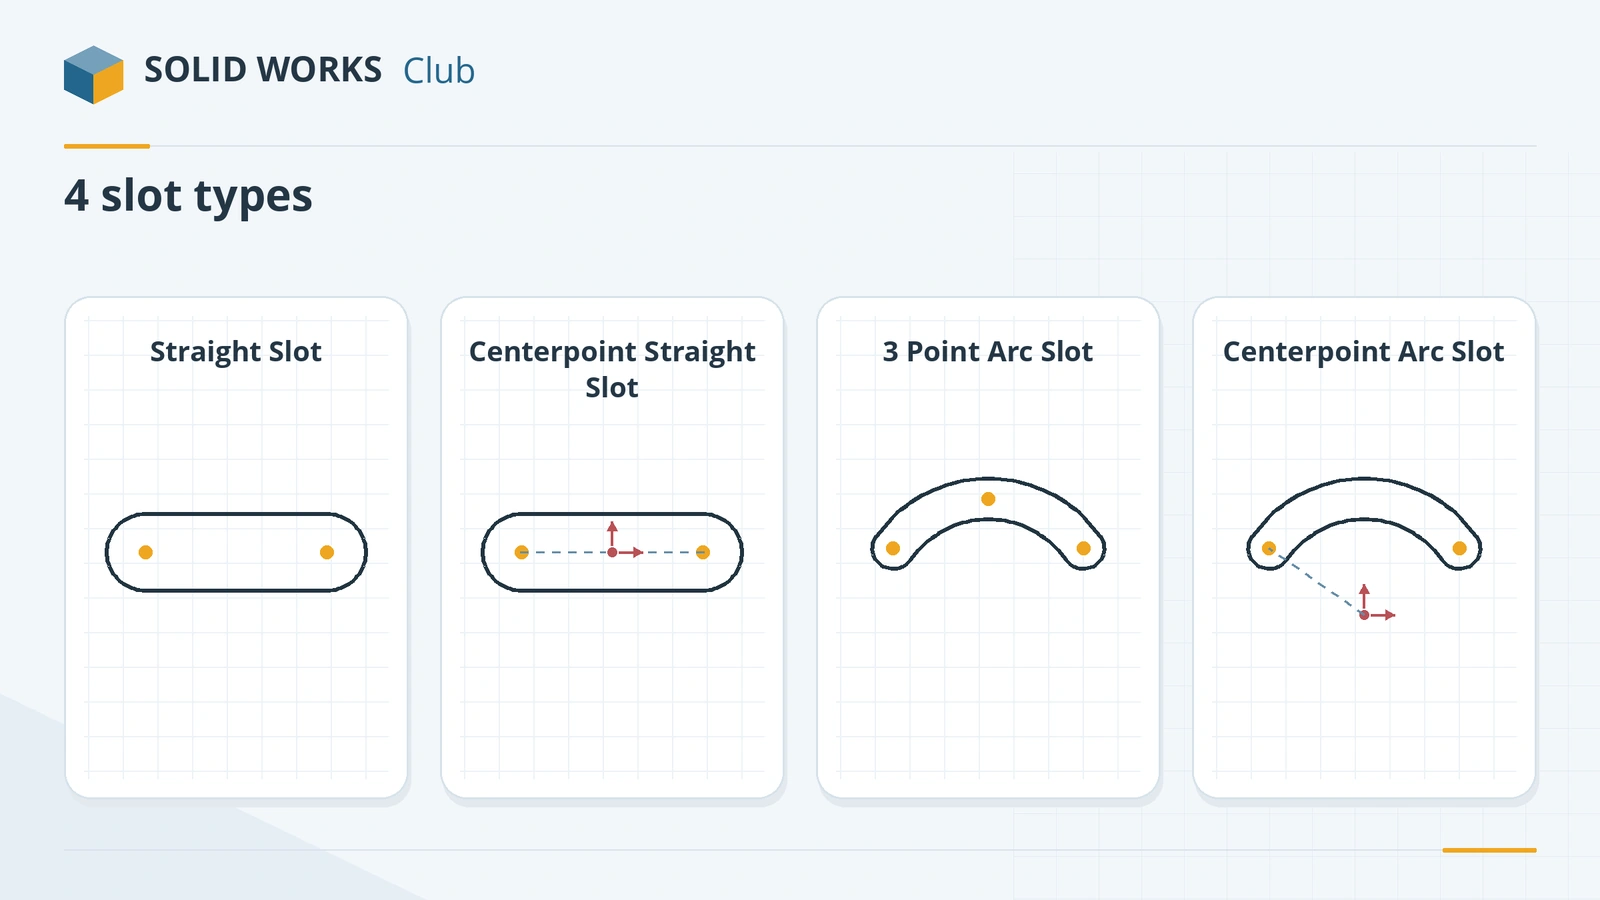 SOLIDWORKS slot toolsHow to sketch slots in SOLIDWORKS: straight, centerpoint and arc slots, the Add dimensions option, and overall versus centre-to-centre length.
-
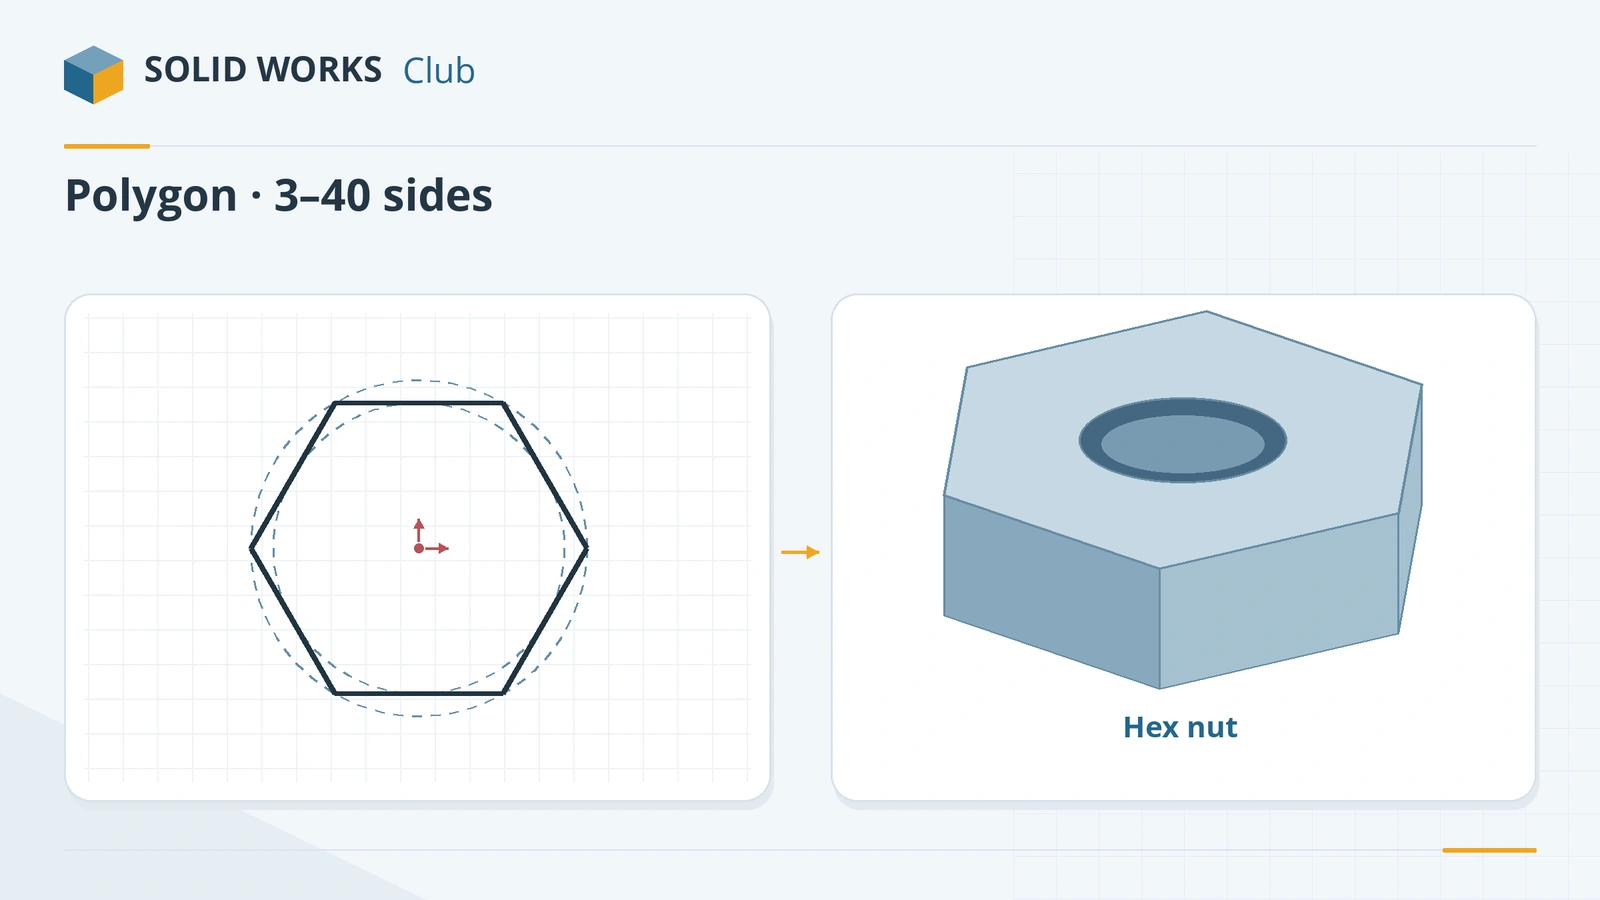 SOLIDWORKS polygon tool (hexagons and more)How to sketch a hexagon or any regular polygon in SOLIDWORKS: 3 to 40 sides, inscribed vs circumscribed circle, across-flats size, rotation and full definition.
-
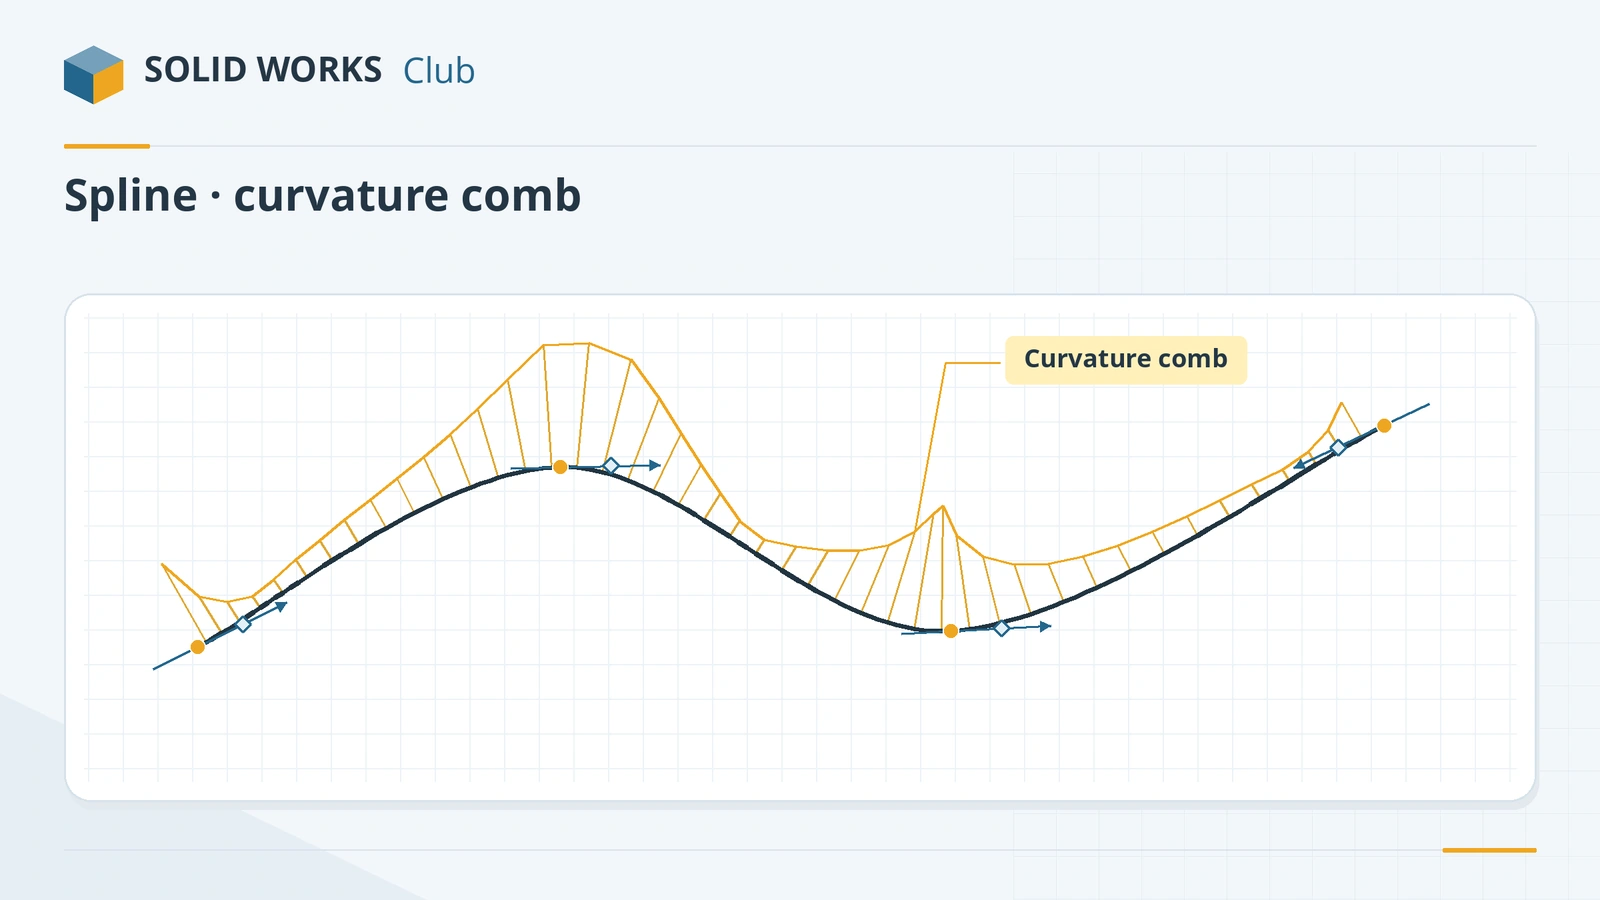 SOLIDWORKS splines — free-form curvesHow to sketch splines in SOLIDWORKS: Spline vs Style Spline, spline handles, curvature combs, adding points, Fit Spline, equation driven curves and XYZ curves.
-
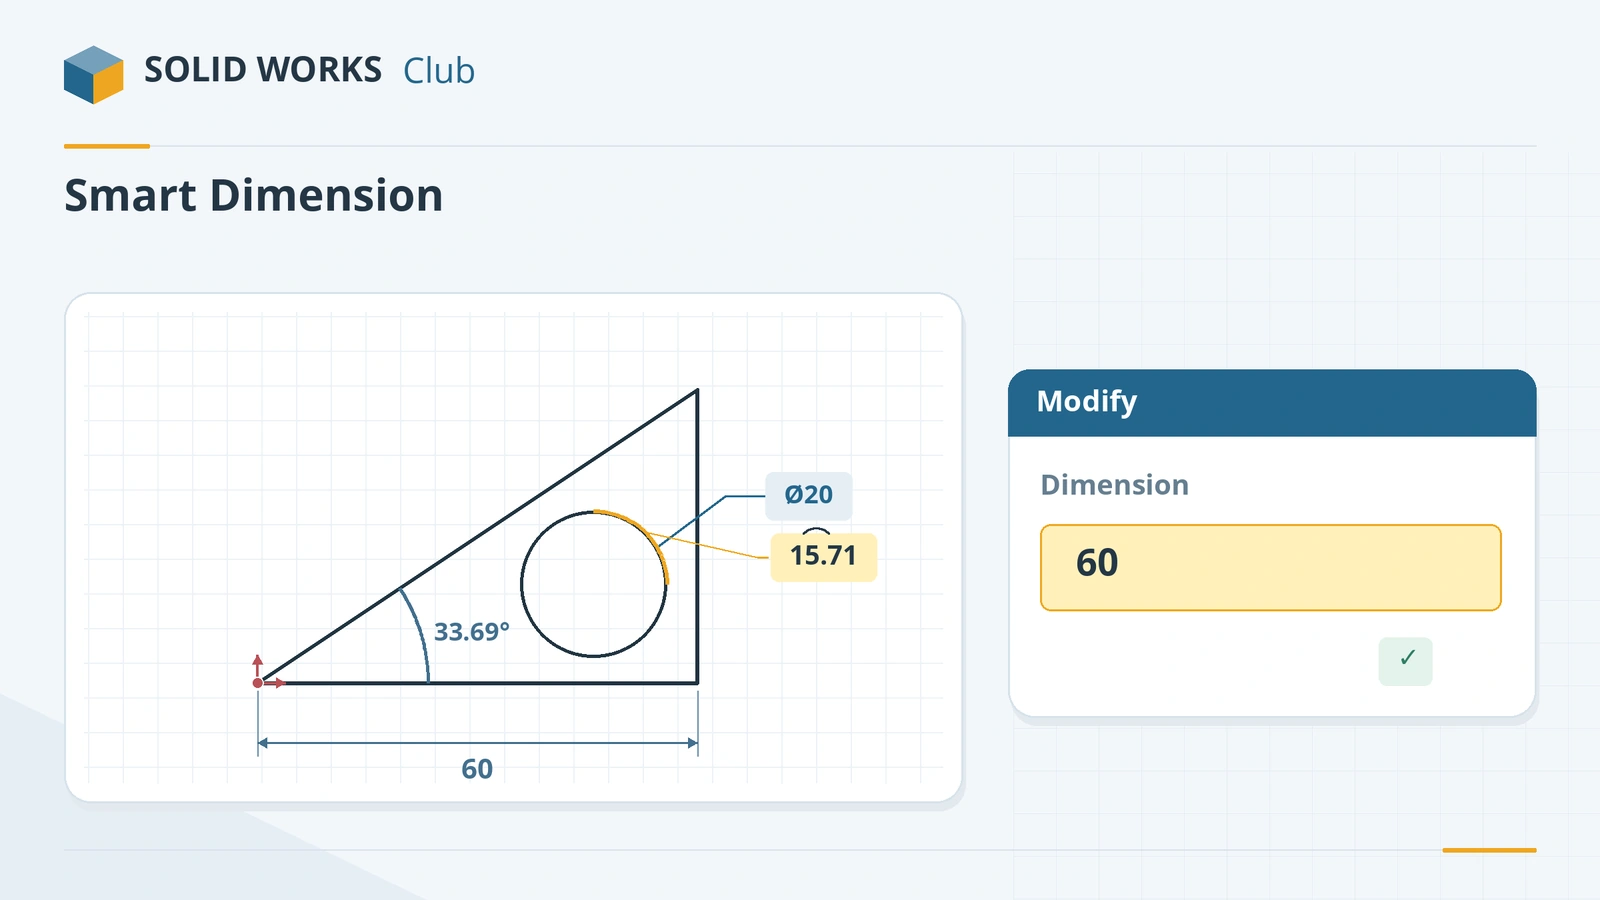 SOLIDWORKS Smart DimensionHow to use Smart Dimension in SOLIDWORKS: linear, angular, diameter and arc length dimensions, Shift for circle edges, the Modify box and equations.
-
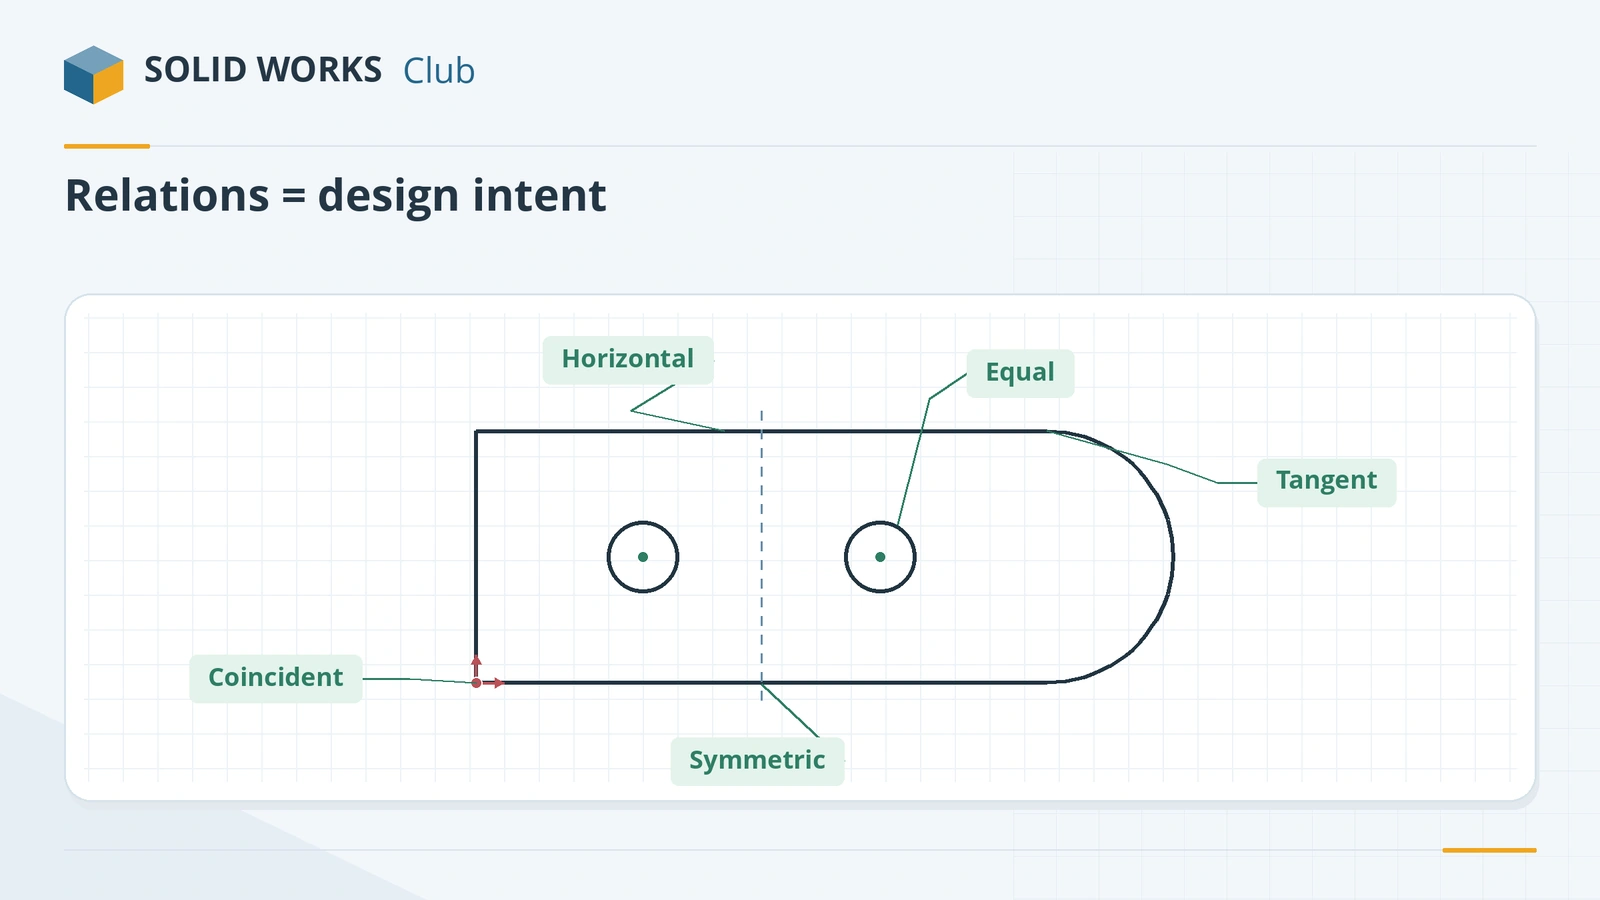 SOLIDWORKS sketch relationsAll SOLIDWORKS sketch relations explained: horizontal, coincident, tangent, equal, symmetric, fix and more, plus how to add, view and delete them.
-
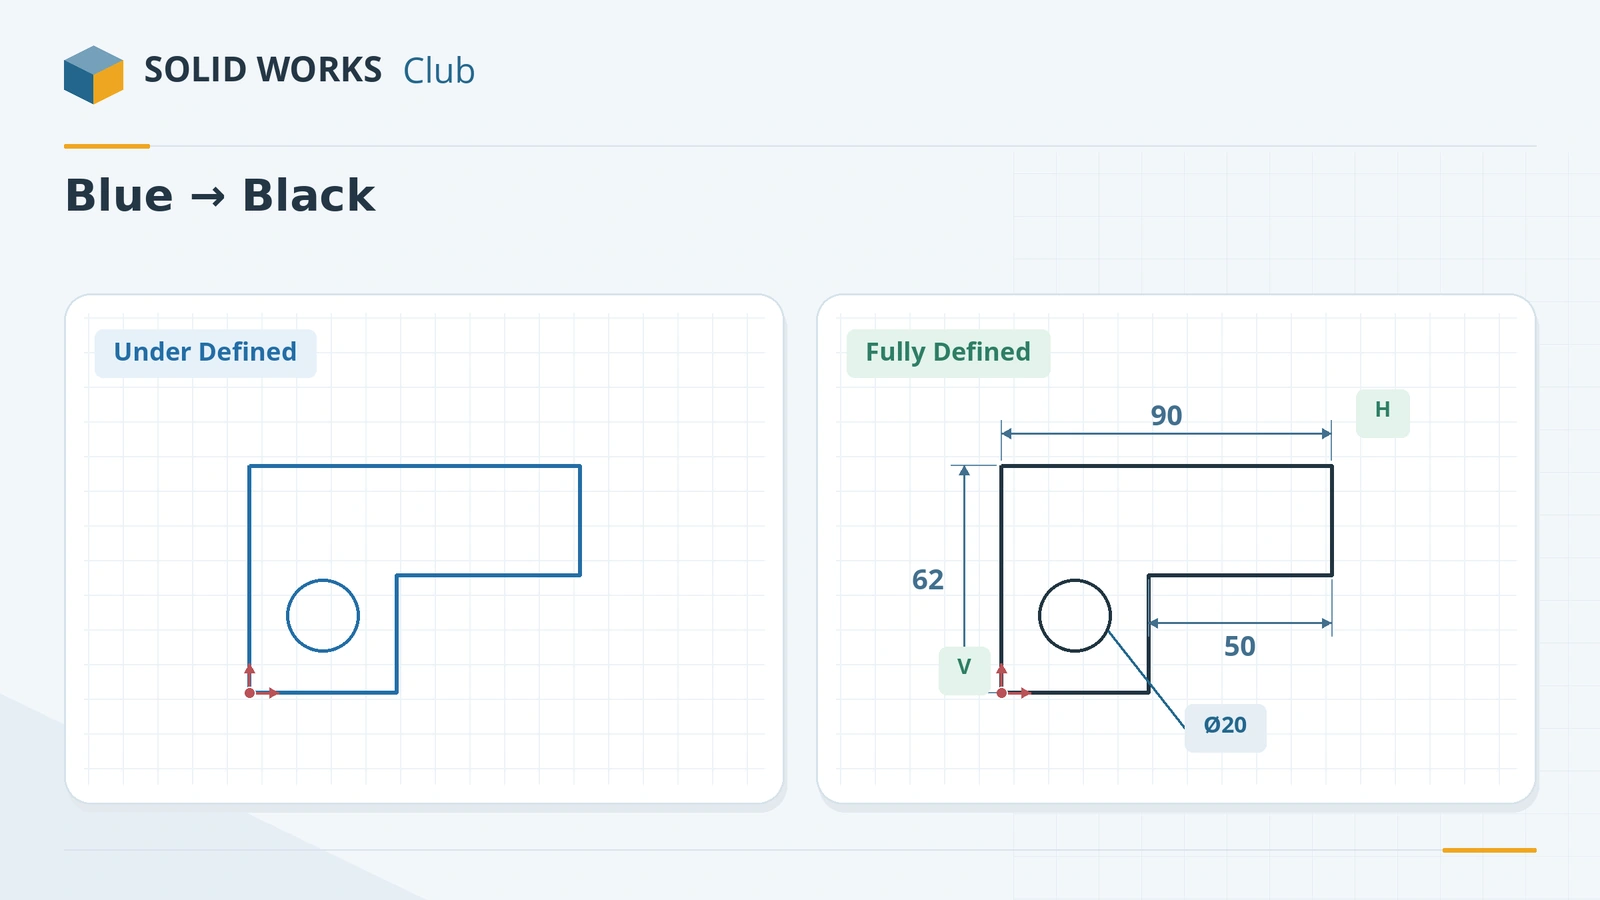 Fully defined sketches in SOLIDWORKSWhat a fully defined sketch is in SOLIDWORKS, how to read blue, black and red geometry, find under defined sketches and use Fully Define Sketch safely.
-
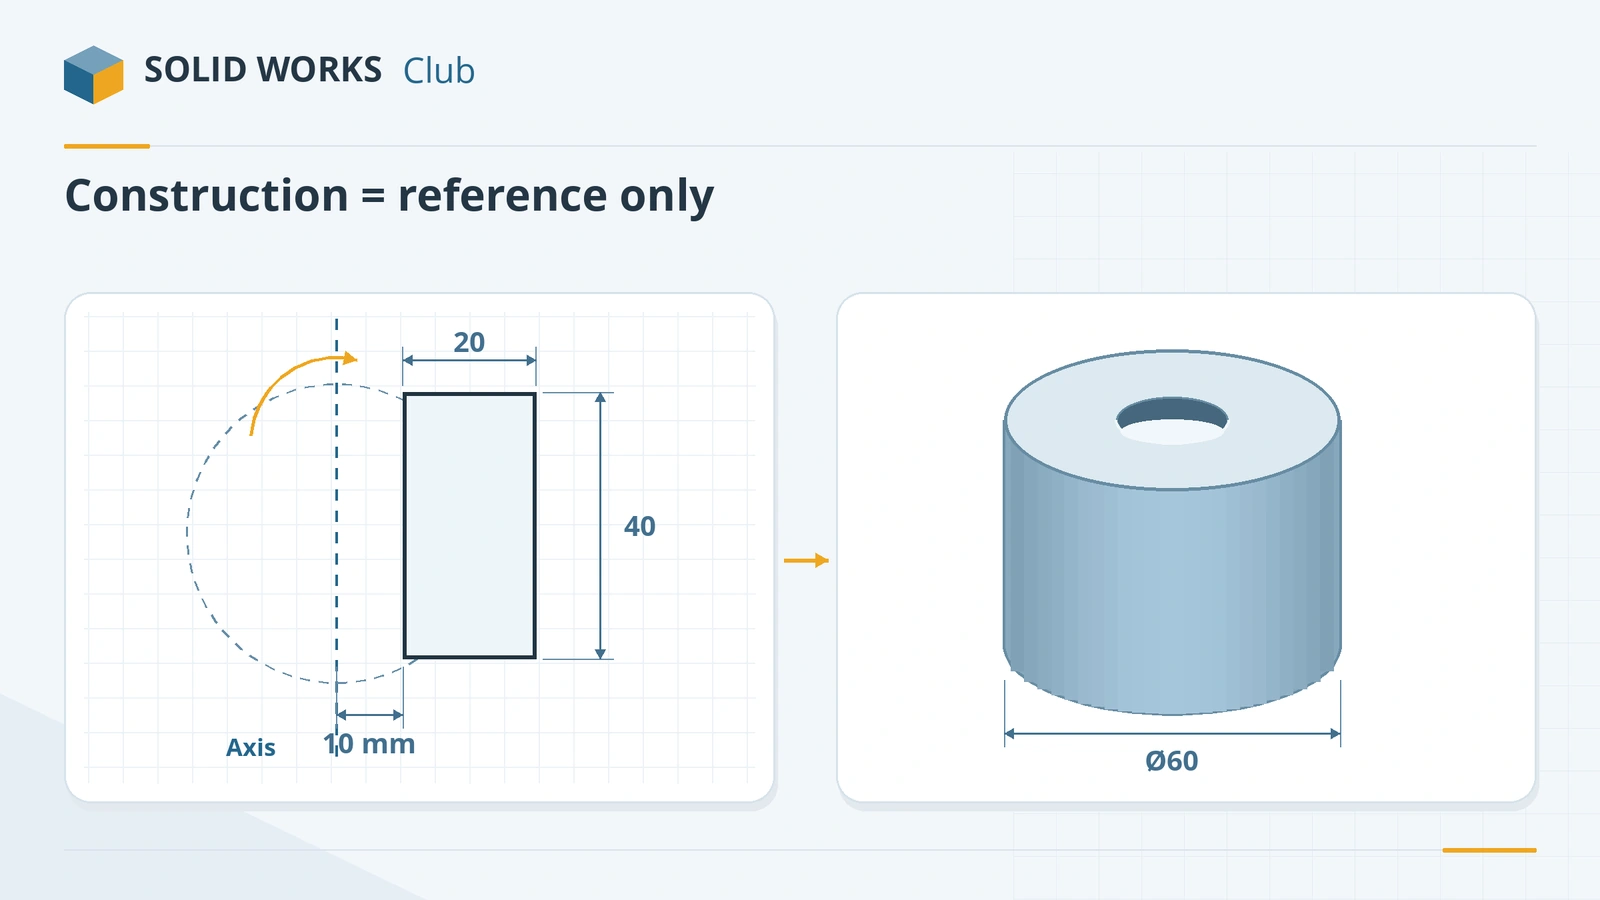 Construction geometry and centerlinesHow construction geometry works in SOLIDWORKS: centerlines, For construction, converting entities, and using them as mirror lines, revolve axes and references.
-
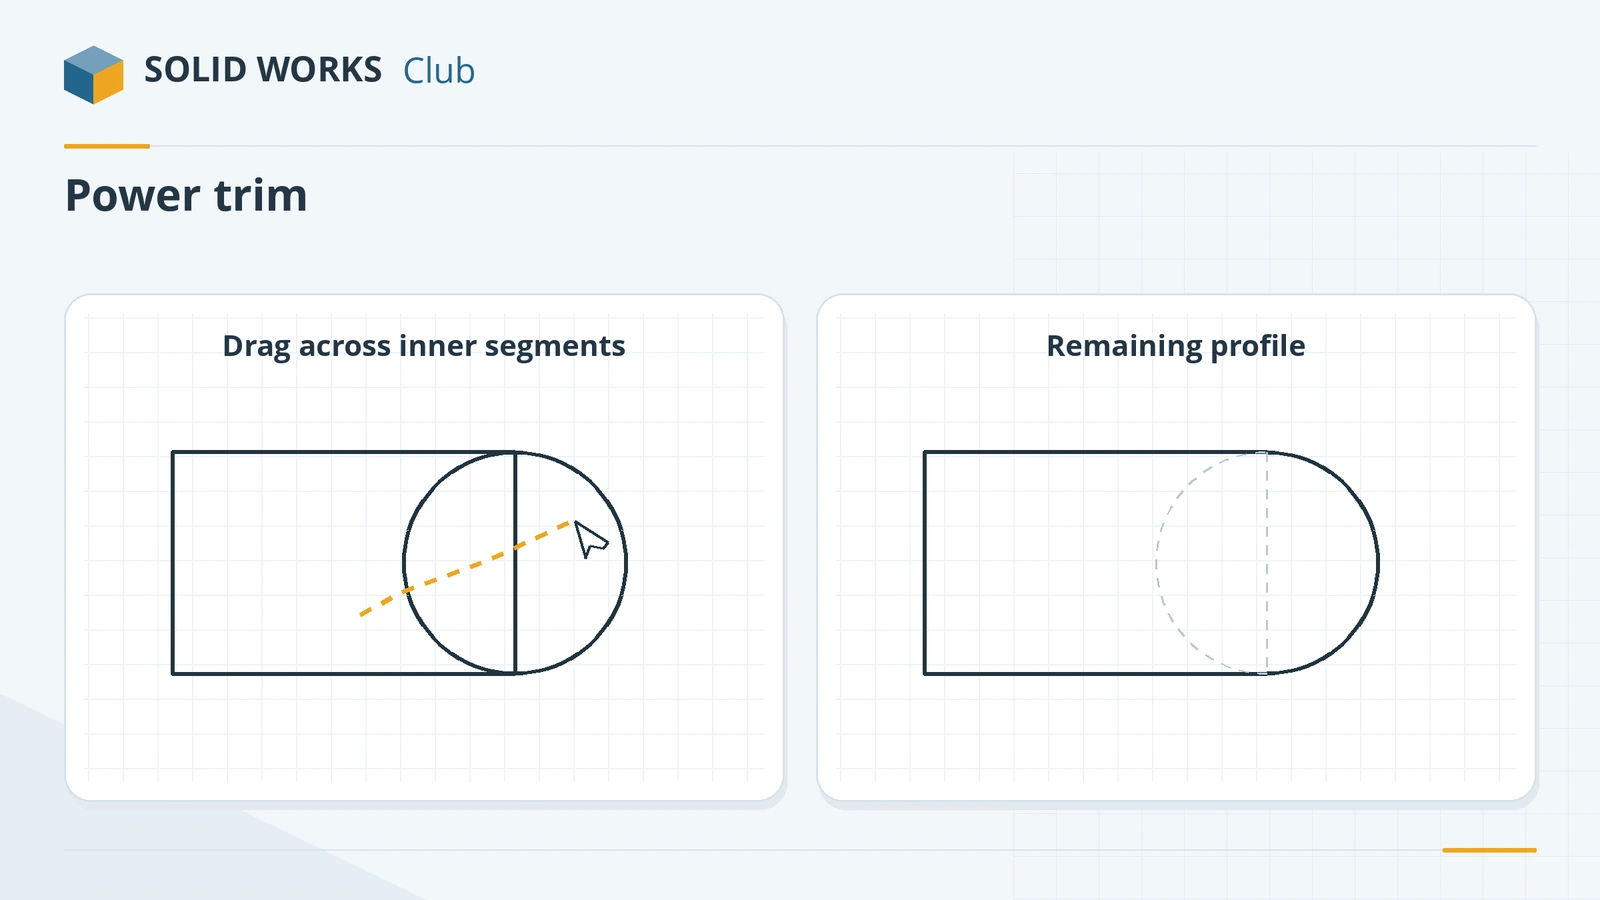 Trim and extend sketch entitiesHow to use Trim Entities in SOLIDWORKS: Power trim, Corner, trim away inside and outside, trim to closest, keep as construction, and extend lines.
-
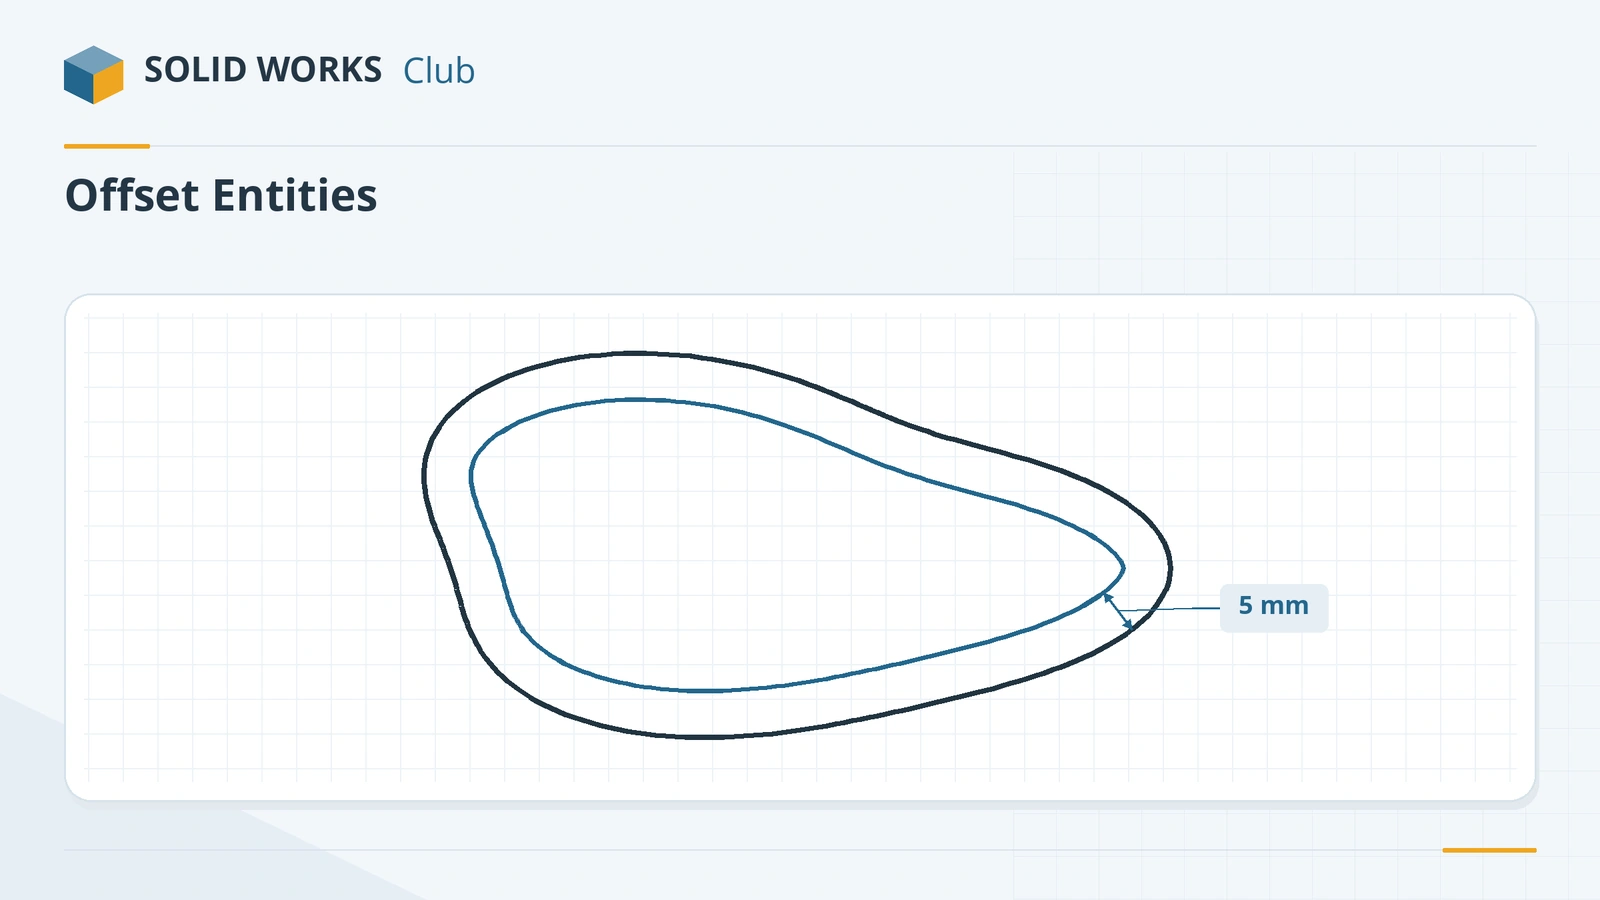 SOLIDWORKS Offset EntitiesHow to use Offset Entities in SOLIDWORKS: offset sketch lines, edges and faces by a distance, reverse, both directions, cap ends and construction base.
-
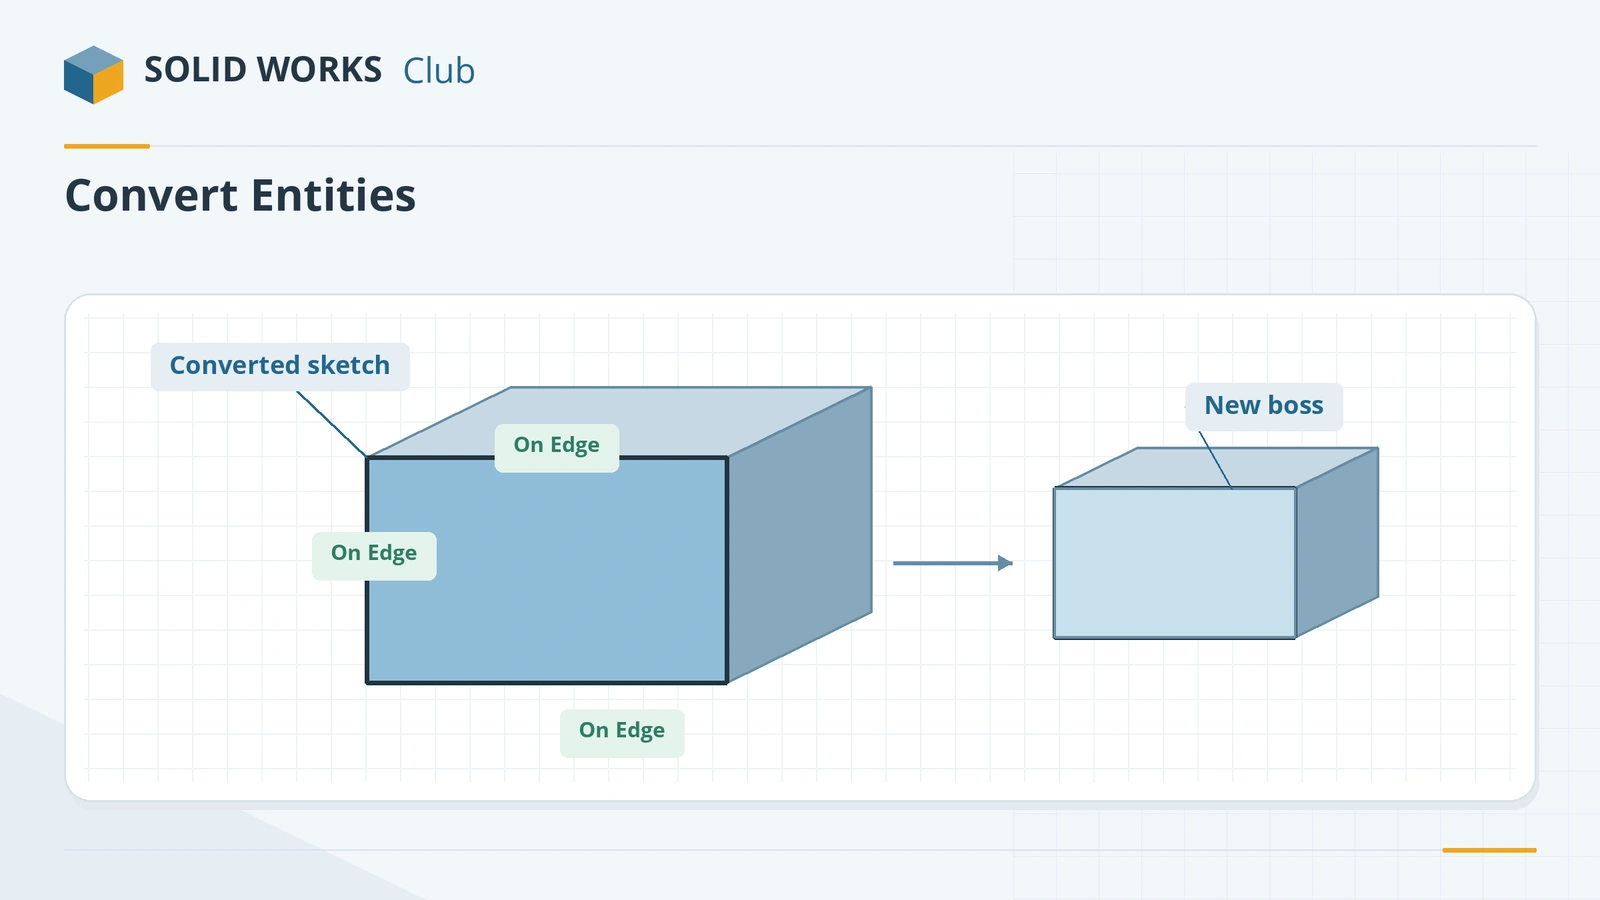 SOLIDWORKS Convert EntitiesHow to use Convert Entities in SOLIDWORKS to project model edges and faces into a sketch, plus On Edge, inner loops, Intersection Curve and Silhouette.
-
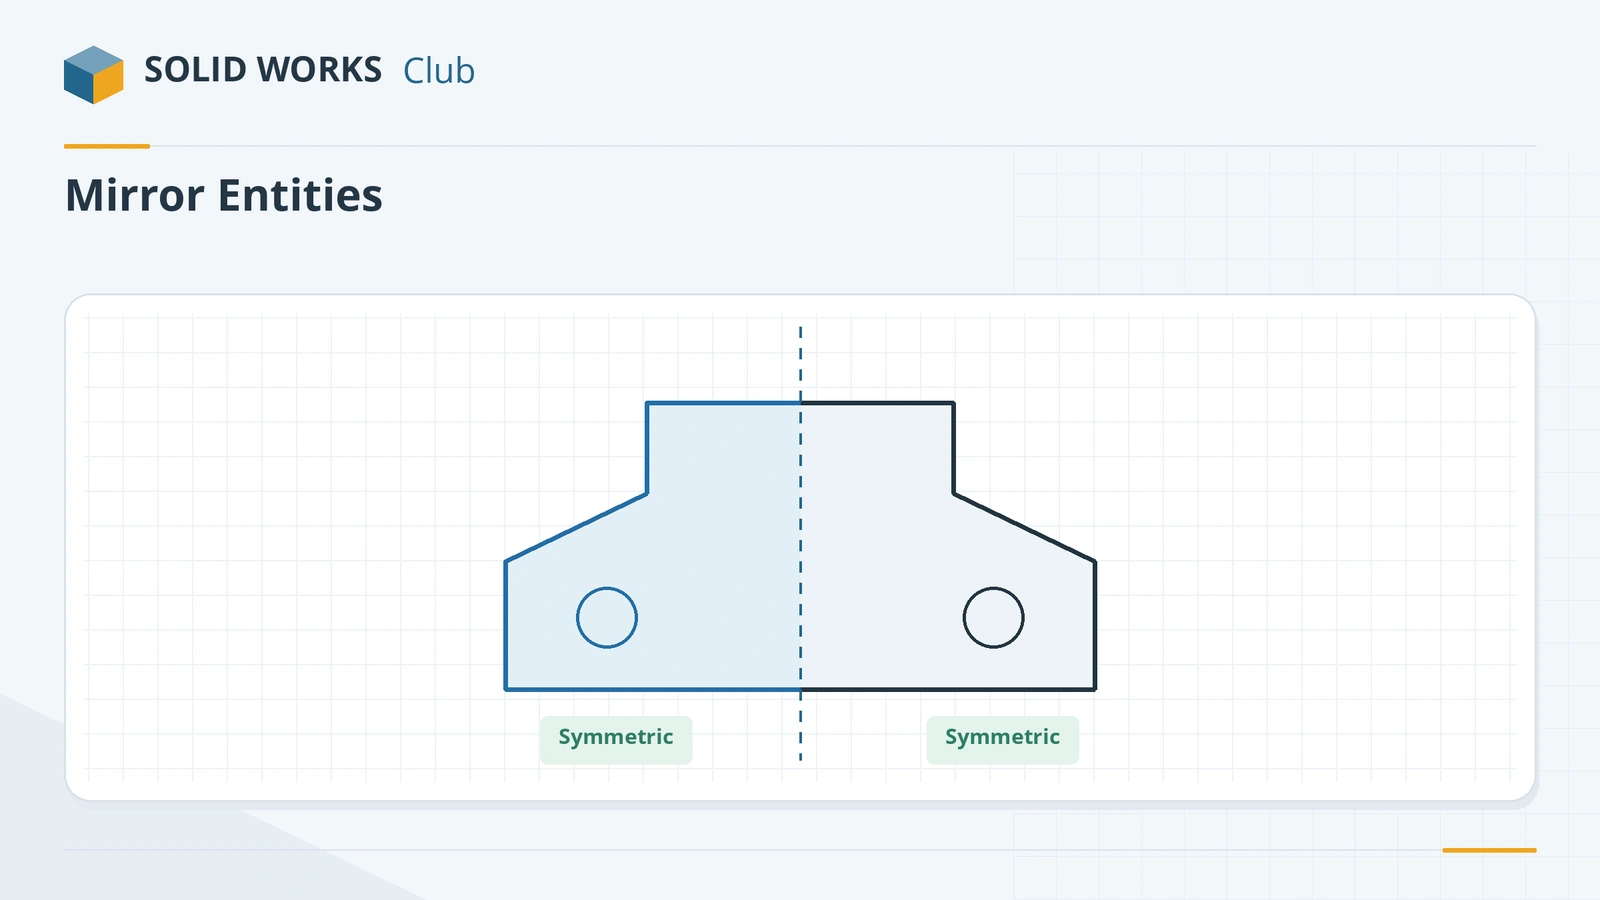 Mirror sketch entities in SOLIDWORKSHow to mirror sketch geometry in SOLIDWORKS with Mirror Entities and Dynamic Mirror, choose a centerline, line, edge or plane, and keep the halves symmetric.
-
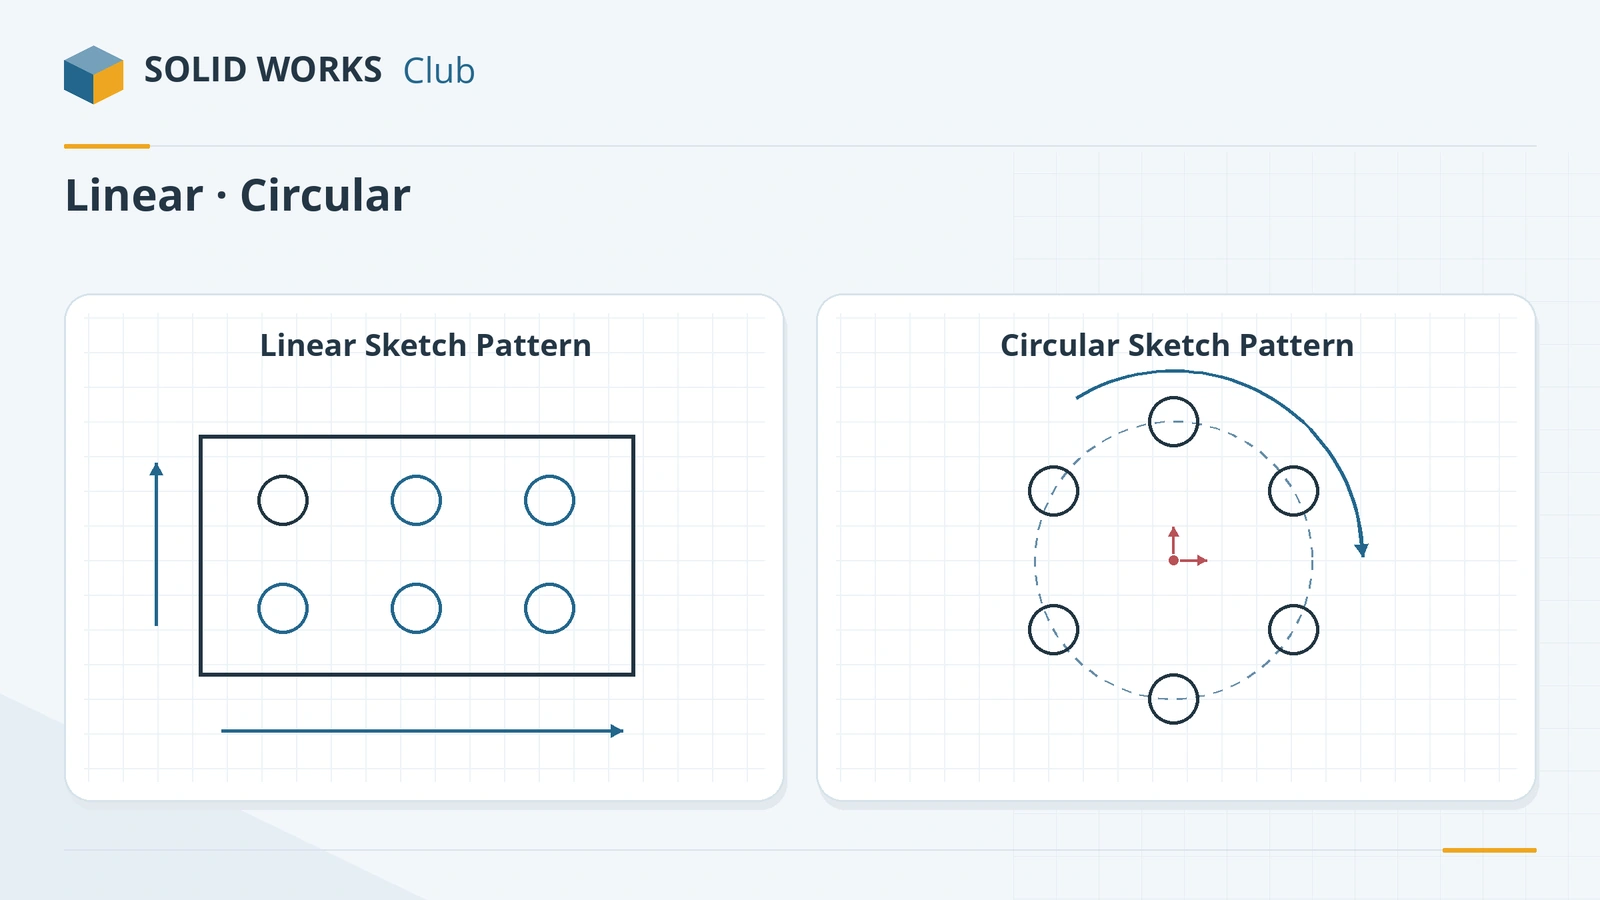 Linear and circular sketch patternsHow to use linear and circular sketch patterns in SOLIDWORKS: spacing, instances, angle, editing a pattern, and when a feature pattern is the faster choice.
-
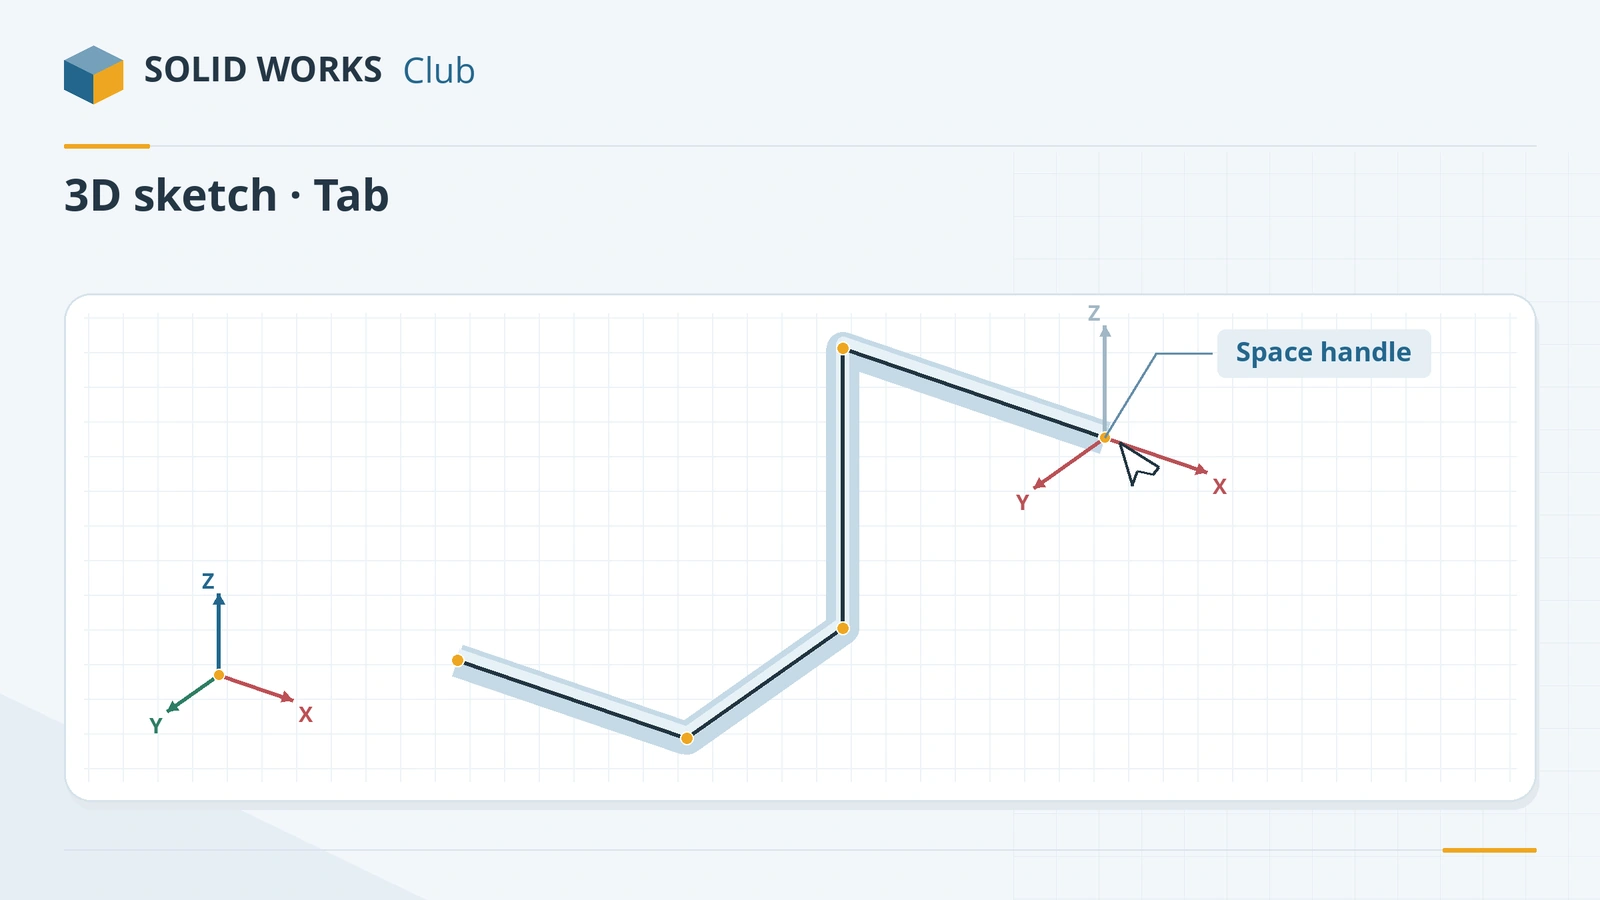 3D sketches in SOLIDWORKSHow to draw a 3D sketch in SOLIDWORKS: start it, switch planes with Tab, use the space handle and Along X/Y/Z relations, and build sweep paths.
Sources
- Hawk Ridge — Sketching basics in SOLIDWORKS (updated Sep 2026)
- Hawk Ridge — 2D sketching tips in SOLIDWORKS (Apr 2023)
- CATI — Tips for new SOLIDWORKS users, part 1
- CATI — Controlling automatic relations
- Solid Solutions — Automatic sketch relations
- CATI — Sketch options worth knowing (Nov 2018)
- Javelin — The SOLIDWORKS confirmation corner
- Javelin — SOLIDWORKS line tool shortcut
- Javelin — Default keyboard shortcuts list (PDF)
- CADimensions — Sketch troubleshooting guide
- Javelin — Choosing the best sketch method (Dec 2025)
- Planchard — SOLIDWORKS 2020 Reference Guide, sketch chapter (sample PDF)
Checked November 2026. SOLID WORKS Club is independent; menu names can differ slightly between releases.
Frequently asked questions
How do I start a sketch in SOLIDWORKS?
+
Click Sketch on the Sketch tab, then pick the Front, Top or Right plane or a flat face of your part. The view turns to face the plane and the origin turns red to show you are in the sketch.
How do I exit a sketch?
+
Click Exit Sketch on the Sketch tab or the sketch icon in the confirmation corner at the top right of the graphics area. The red X there discards your changes.
What do the sketch colours mean?
+
Blue geometry is under defined and can still move, black is fully defined, and red means over defined or conflicting. Sources differ on yellow, so read the status bar, which names the state.
How do I stop SOLIDWORKS adding relations automatically?
+
Hold Ctrl while you click to skip automatic relations for that point, or switch them off under Tools → Sketch Settings → Automatic Relations.
Related
- SOLIDWORKS Line toolHow to draw lines in SOLIDWORKS: the Line, Centerline and Midpoint Line tools, chain drawing, switching to a tangent arc, orientation options and L.
- SOLIDWORKS Smart DimensionHow to use Smart Dimension in SOLIDWORKS: linear, angular, diameter and arc length dimensions, Shift for circle edges, the Modify box and equations.
- Fully defined sketches in SOLIDWORKSWhat a fully defined sketch is in SOLIDWORKS, how to read blue, black and red geometry, find under defined sketches and use Fully Define Sketch safely.
- Your first SOLIDWORKS part, step by stepModel your first SOLIDWORKS part in 15 minutes: a sketch on the Front Plane, Smart Dimension, Extruded Boss, a hole and fillets, with a check mass.