Sketching · Lesson 4
SOLIDWORKS arc tools
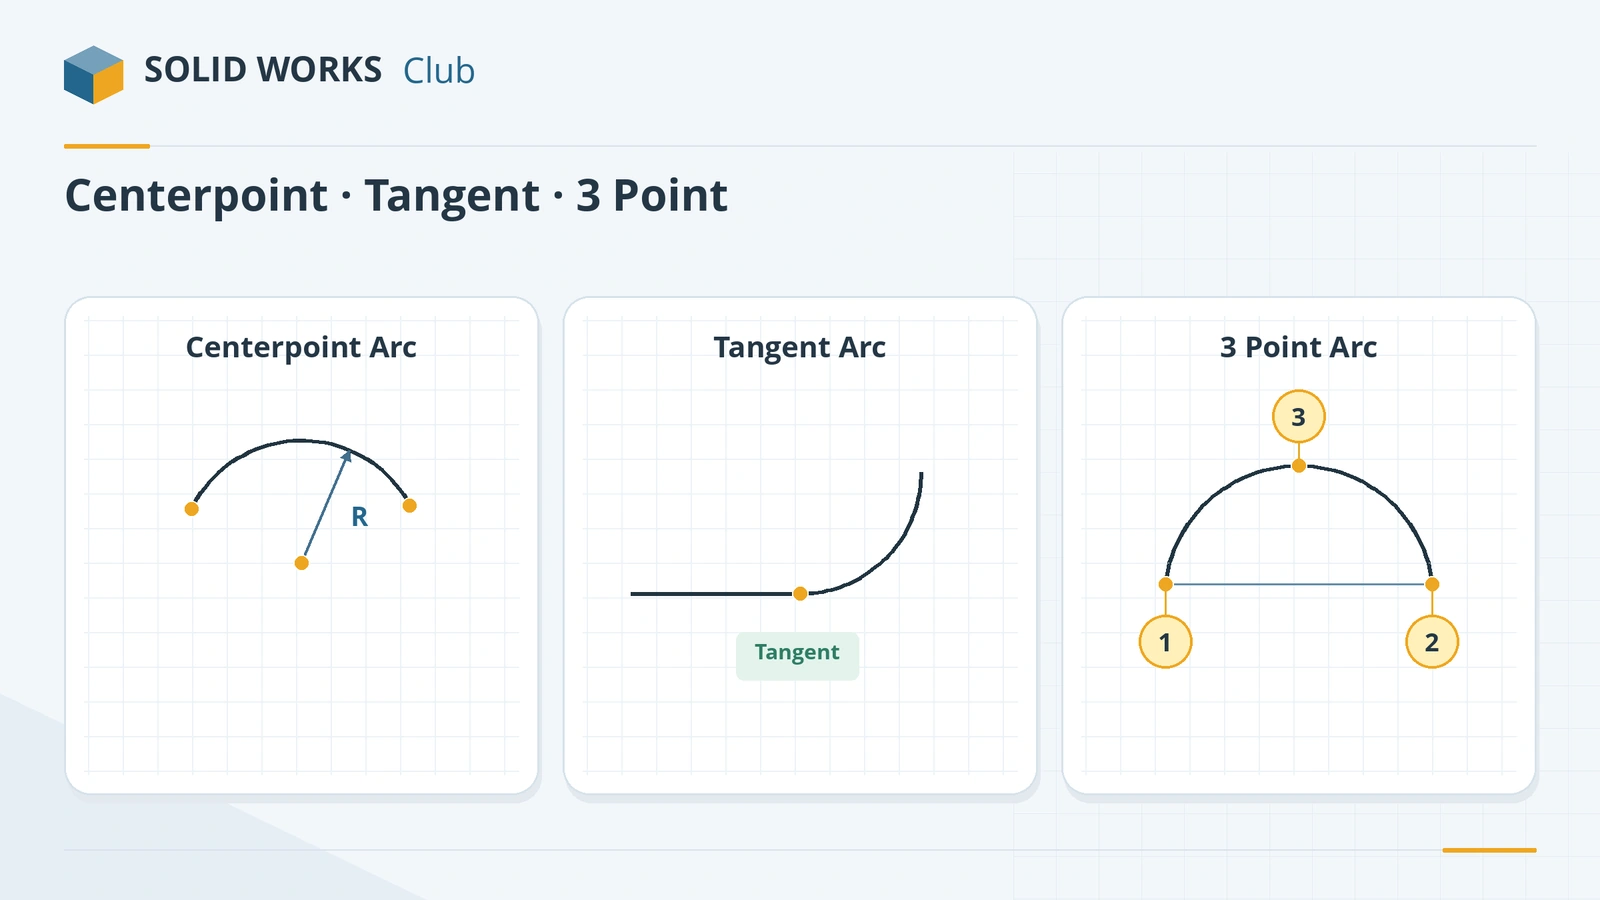
SOLIDWORKS has three arc tools. Centerpoint Arc starts from the centre, like a compass. Tangent Arc continues smoothly from the end of a line or another arc. 3 Point Arc goes from one endpoint to another through a third point that sets its curvature. Pick the tool that matches what you know: the centre, the tangent, or the two ends.
 Kevin Walsh
Where to find it
Sketch tab → Arc flyout (Centerpoint Arc, Tangent Arc, 3 Point Arc)
Which arc tool to use
| Tool | Clicks | Use when you know |
|---|---|---|
| Centerpoint Arc | Centre → start (sets radius) → end | The centre, e.g. rounded ends around holes |
| Tangent Arc | Start on an existing endpoint → end | The arc must flow smoothly from a line or arc |
| 3 Point Arc | Start → end → a point on the arc | The two ends, e.g. a curved top on a straight base |
The fastest way to get tangent arcs while outlining is to stay in the Line tool and press A. For two parallel lines joined by arcs at both ends, the Slot tool is quicker still.
Step by step
-
1
Draw the base line
On the Front Plane draw a horizontal line 40 mm long, centred on the origin (use a Midpoint Line or dimension it).
-
2
Add a 3 Point Arc on top
Arc → 3 Point Arc. Click the left end of the line, then the right end, then move up and click to set the bulge.
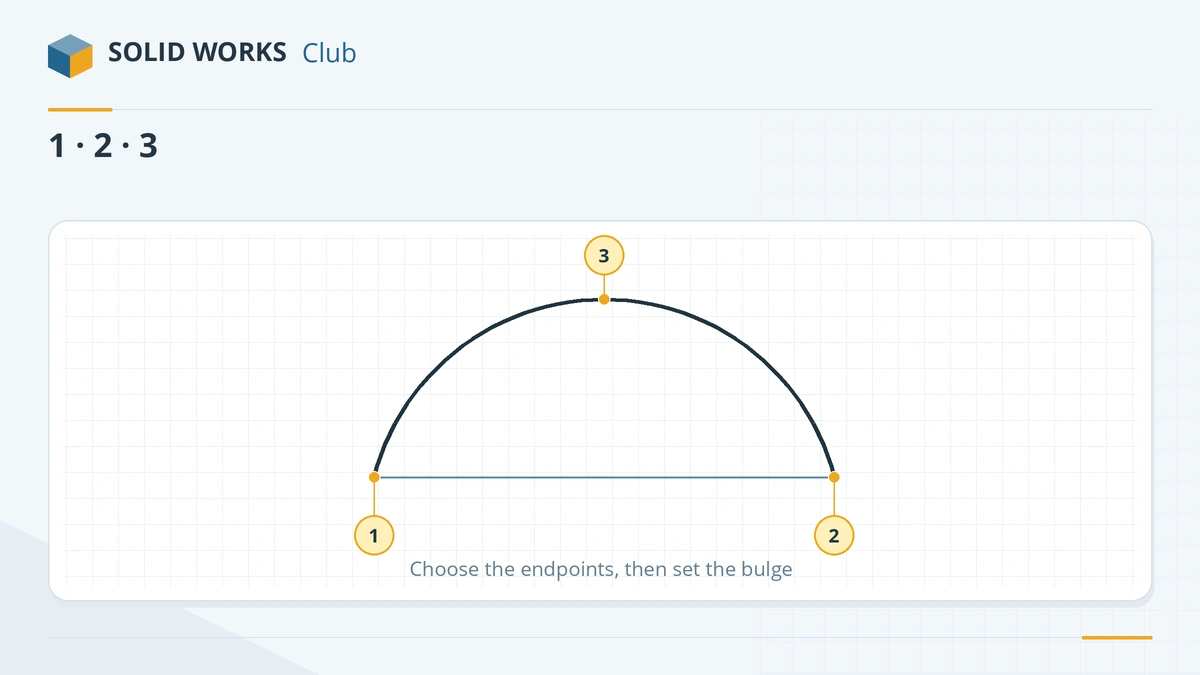
3 Point Arc — the first two clicks are the ends, the third sets the curvature. -
3
Make it a half circle
Add a radius dimension of 20 to the arc. With a 40 mm chord and R20 the arc is a semicircle whose centre sits on the line.
-
4
Exit and extrude
The outline is closed (line + arc). Exit the sketch and extrude it 10 mm.
Common mistakes
- Drawing a full circle and trimming it to an arc — it leaves extra geometry and relations. Use the arc tools directly.
- A tangent arc that curls the wrong way. Since SOLIDWORKS 2018 you can right-click the arc → Relations → Reverse Endpoint Tangent.
- Using Centerpoint Arc when you know only the ends. 3 Point Arc fits that case.
Lesson 4 of 17 in the sketching course.
Practice
Build the D-shape above: a 40 mm line and a 3 Point Arc of R20 above it, extruded 10 mm. Check: volume 6,283.19 mm³ (half of a Ø40 disc, 10 mm thick).
Sources
- Javelin — Using arc tools in SOLIDWORKS (Jul 2025)
- CATI — Line to tangent arc transition
- Javelin — Tips and tricks for line drawing (Oct 2022)
- SOLIDWORKS Tech Blog — Reverse arc and spline tangency (2018)
- Planchard — SOLIDWORKS 2020 Reference Guide, sketch chapter (sample PDF)
Checked November 2026. SOLID WORKS Club is independent; menu names can differ slightly between releases.
Frequently asked questions
How do I draw a tangent arc in SOLIDWORKS?
+
Use Arc → Tangent Arc and start from the end of a line or arc, or stay in the Line tool and press A (or move back onto the endpoint and away again) to switch to an arc.
How do I draw an arc with a known centre?
+
Use Centerpoint Arc: click the centre, then the start point (which sets the radius), then the end point.
How do I flip the direction of a tangent arc?
+
Since SOLIDWORKS 2018, right-click the arc and choose Relations → Reverse Endpoint Tangent.
How do I dimension arc length?
+
With Smart Dimension, click the arc and then both of its endpoints. The dimension shows the length along the arc.
Related
- SOLIDWORKS Line toolHow to draw lines in SOLIDWORKS: the Line, Centerline and Midpoint Line tools, chain drawing, switching to a tangent arc, orientation options and L.
- SOLIDWORKS slot toolsHow to sketch slots in SOLIDWORKS: straight, centerpoint and arc slots, the Add dimensions option, and overall versus centre-to-centre length.
- SOLIDWORKS circle toolsHow to sketch circles in SOLIDWORKS with the Circle and Perimeter Circle tools, dimension the diameter, add Equal relations and measure to the edge.
- SOLIDWORKS sketch relationsAll SOLIDWORKS sketch relations explained: horizontal, coincident, tangent, equal, symmetric, fix and more, plus how to add, view and delete them.