Weldments · Lesson 3
Trim/Extend for weldment members
Members from different Structural Member features do not trim each other, so joints between them are cleaned up with Trim/Extend. End Trim cuts one or more members back to a face, plane or body; End Miter and the two End Butt types join two members at a corner. Allow extension lets a short member grow to the boundary.
 Kevin Walsh
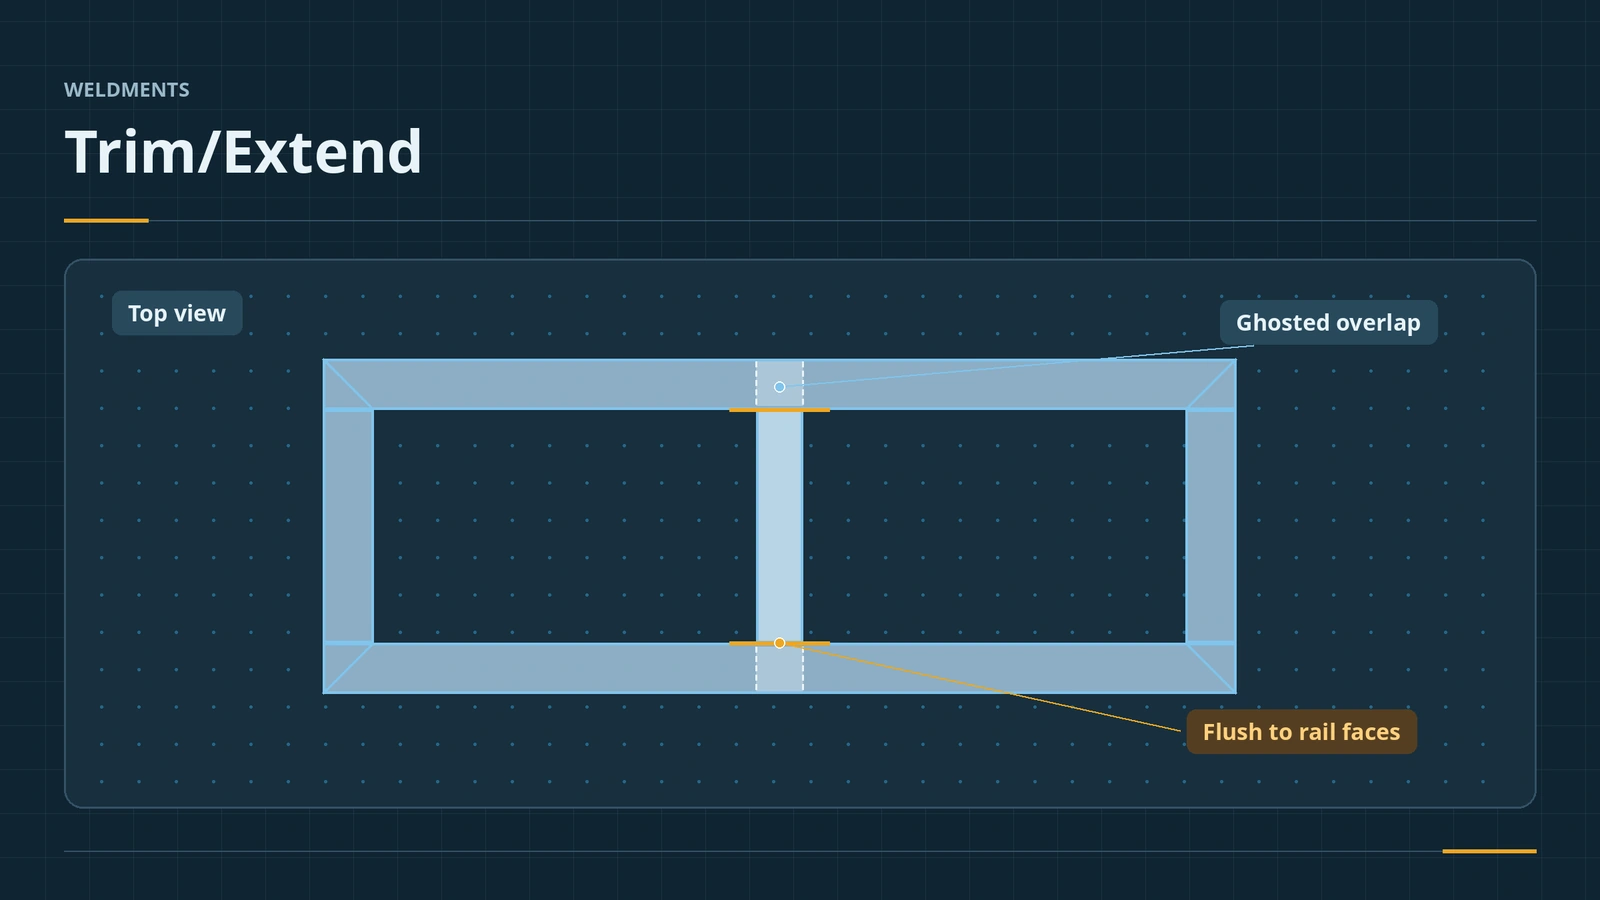
Where to find it
Weldments tab → Trim/Extend
Corner types
| Type | Bodies | Result |
|---|---|---|
| End Trim | One or more | Trimmed to a face, plane or body |
| End Miter | One + one | Mitred corner; 2021+: bisector or full flush |
| End Butt1 / End Butt2 | One + one | One member butts against the other |
Weld gap shortens the trimmed member for a weld; one source notes it only works with a simple cut. Turn Preview off on large frames until all selections are made. Sketch trimming is a different tool — see sketch Trim and Extend.
Step by step
-
1
Add a cross member
In the table frame, sketch a line across the middle of the top, from one long rail's centreline to the other. Make a new Structural Member on it with the same tube. It overlaps the rails.
-
2
Start Trim/Extend
Trim/Extend, corner type End Trim. Bodies to be trimmed: the cross member.
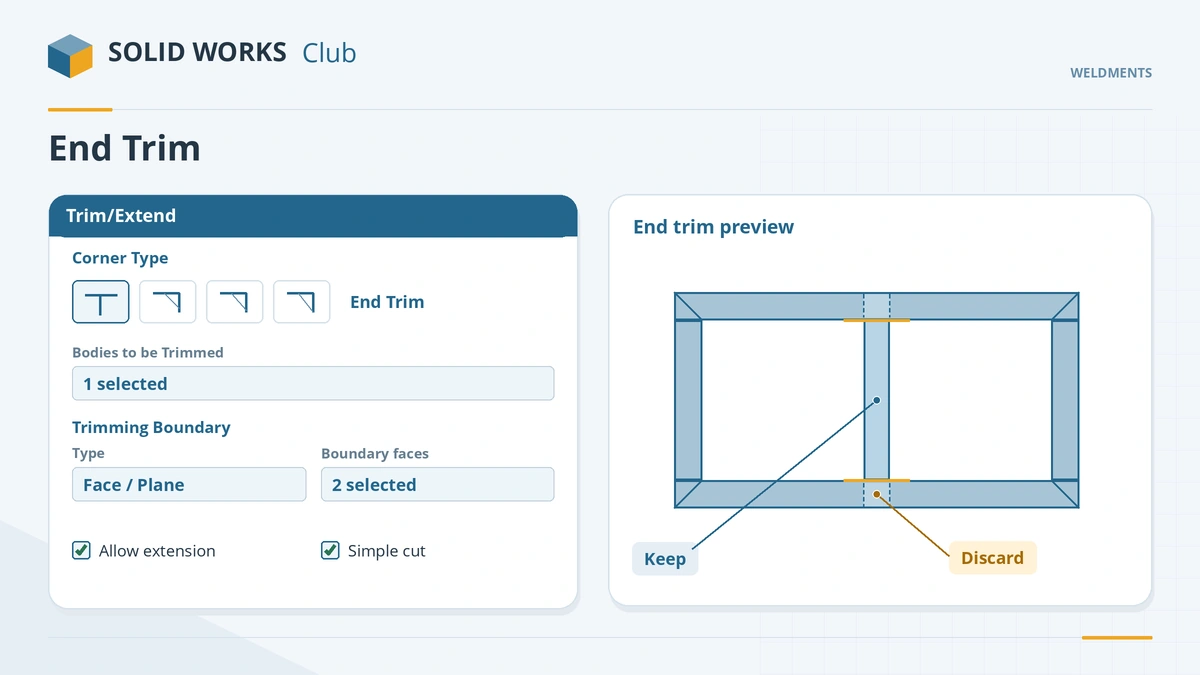
End Trim cuts members back to faces, planes or bodies. -
3
Pick the boundary
Trimming boundary: Face / Plane, select the inner faces of both long rails. Keep Allow extension and Simple cut between bodies. Click the tick.
-
4
Check the joint
The cross member now ends flush against both rails, its length equal to the clear gap between them.
Common mistakes
- Several faces as one boundary creating extra bodies — select only the faces you need.
- Using Bodies as the boundary when a face would do — Face / Plane rebuilds faster.
- Forgetting that trimming creates new bodies — manually added cut list properties can be lost.
Lesson 3 of 7 in the weldments course.
Practice
Add the cross member and trim it to the inner faces of the long rails. Check: the cut list gains one new item (quantity 1), and its Length property equals the inside width of the frame.
Sources
- SOLIDWORKS Help 2024 — Trim/Extend PropertyManager
- GoEngineer — Weldment profiles and weldment tools guide (Jan 2022)
- Dassault Systèmes — Working with Weldments, SolidPractices (rev. May 2025)
- ST Technica — SolidWorks weldment gap (2011)
- Javelin — 2021 structural member trims for end miter joints (Dec 2020)
- SOLIDWORKS Tech Blog — Miter joints with different sized profiles in 2021 (Aug 2021)
- Engineers Rule — A beginner's guide to SOLIDWORKS weldments (May 2016)
Checked November 2026. SOLID WORKS Club is independent; menu names can differ slightly between releases.
Frequently asked questions
How do I trim weldment members in SOLIDWORKS?
+
Use Trim/Extend: choose the corner type, the bodies to trim and the trimming boundary, set keep or discard on the callouts, and click OK.
What is the difference between a simple cut and a coped cut?
+
A simple cut ends the member flush at planar contact faces. A coped cut trims it to the exact shape of the touching body, such as a round pipe.
What do End Butt1 and End Butt2 mean?
+
They choose which of the two members runs through at the corner and which one butts against it.
What changed for miters in 2021?
+
Two miter options for different-sized members: the old bisecting miter and a full flush miter.
Related
- Structural Member — your first weldment frameBuild a SOLIDWORKS weldment frame with Structural Member: layout sketch, standard, type and size, groups, corner treatment, trim order and locating the profile.
- Gussets in SOLIDWORKS weldmentsAdd gussets to a SOLIDWORKS weldment: supporting faces, triangular or polygonal profile, chamfer for the weld, thickness, location and cut list description.
- Weldment cut listsHow the SOLIDWORKS weldment cut list works: grouping identical bodies, LENGTH and ANGLE properties, bounding boxes, properties and the cut list table.
- Trim and extend sketch entitiesHow to use Trim Entities in SOLIDWORKS: Power trim, Corner, trim away inside and outside, trim to closest, keep as construction, and extend lines.